Database View
Warning
The current page still doesn't have a translation for this language.
But you can help translating it: Contributing.
Overview
The DATAMIMIC Database View is the central workspace for metadata-driven artifact generation from relational databases.
It combines scope selection, dependency planning, weighting preparation, schema drift visibility, and model creation actions in one place.
As of 3.1.0, generating a DATAMIMIC model from database metadata is handled in the Database View and no longer in the Editor file flow.
As of 3.2.0, this flow is organized in dedicated Database workbench tabs (Planning, Weighting, Schema history) with dedicated model configuration.
As of 3.5.0, the Database View is part of the Workbench (Database mode): select a SQL database environment in the Workbench to open this flow. MongoDB collections and object storage are available as additional Workbench modes.
The generated model is saved as a project file and opens in the Editor. It is not automatically included in datamimic.xml or executed.
Maturity and Expectation Setting
Database View metadata-based model support is actively evolving and is under continuous development.
Treat generated artifacts and recommendations as a strong starting point, not as final production-ready output.
- Manual review and tuning remain expected, especially for complex relationships and large production schemas.
- Recommendation outcomes depend on metadata quality, relationship quality, and project-specific masking requirements.
- Use Mark as personal data for an explicit manual personal-data mark and Remove manual mark to remove only that mark. Recommendations remain review input, not catalog rules.
Planned expansion areas include:
- richer override controls for recommendation decisions,
- stronger support for project- and environment-specific aliases (generators, entity attributes, PII field aliases),
- assisted pre-de-identification flows based on uploaded specifications for large metadata structures.
Before You Start
- Create a database Environment.
- Run Refresh metadata snapshot for this environment.
- If metadata is outdated or inconsistent, run Reset metadata snapshot and then Refresh metadata snapshot again.
This reset/rescan flow is the supported way to refresh model inputs after schema changes.
Supported Relational Databases
- PostgreSQL
- Oracle
- Additional systems if enabled on your instance
Key Capabilities
Environment, Schema, Table, and Column Transparency
- Select one environment from the dropdown.
- Browse tables and columns with clear structure visibility.
- Review schema-qualified table names where available to avoid ambiguity.
- Use the schema filter in the sidebar to narrow large table lists quickly.
Metadata Scan Scope (All Accessible Schemas)
- Refresh metadata snapshot uses the database as scope and reflects all schemas that are accessible for the configured user.
- The schema configured in the environment is treated as the default schema for unqualified names.
- Schemas that are not accessible are skipped (best-effort behavior) and reported in task logs.
- This broader metadata scope improves discovery of cross-schema relationships used by Plan Subset and metadata-driven artifact generation.
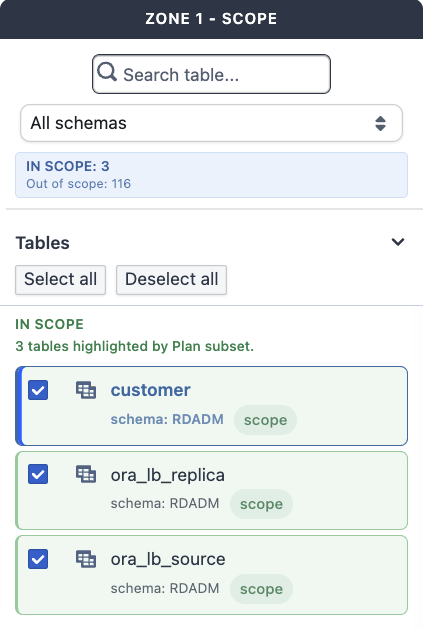
Subset Selection and Bulk Actions
- Select tables and columns for your model subset.
- Use Select All / Deselect All to reset or apply selection quickly.
- When a table filter is active, Select All / Deselect All applies to the currently visible filtered table list.
- The table checkbox changes the model scope; the adjacent table control opens its columns without changing the scope.
- Use Previous and Next to inspect the planned tables after a successful subset plan.
Plan Subset (Relationship Closure)
- Run Plan Subset to analyze table relationships and foreign-key dependencies.
- The required closure is applied to the scope automatically for referentially consistent generation.
- After planning, the sidebar table list is focused to IN SCOPE tables only.
- Use Reset in the Planning step to invalidate the active subset snapshot before choosing a new root scope.
- Configure model is enabled only after Plan subset has produced a fresh, reviewable validation result for the current scope.
PII Pre-Selection
For a De-identification model, the wizard can preselect personal-data candidates in the planned scope using the project threshold. Review and adjust the resulting selection before creation.
Database Workbench Tabs
- Planning: run subset closure planning and validate dependencies before generation.
- Weighting: prepare weighting scope from selected table columns and create weighting files.
- Schema history: inspect schema drift and metadata snapshot changes.
Configure a Model from Planning

Use Configure model in Generate artifacts after planning:
| Model type | Source and target behavior |
|---|---|
| Synthetic data model | Reads source database metadata and does not write to a target database. |
| De-identification model | Reads source data and writes de-identified data to the explicitly selected target database. |
| ML training model | Reads source database metadata and does not write to a target database. |
The wizard saves the generated XML file and opens it in the Editor. Decide yourself whether to compose it from datamimic.xml; the include reference owns the XML syntax.
Relationship Source for References
When creating a database model artifact, choose how <reference> values are resolved:
| Mode | Use when | Constraints |
|---|---|---|
database |
You want parent-key reuse to be driven by source DB records (source + sourceType) |
Supported across DB builder modes. |
weighting_files |
You want fully synthetic FK selection from weighting files under data/ (.wgt.csv / .wgt.ent.csv) |
Supported only for model creation with builder_mode=synthetic; .wgt.csv is single-target only. |
The EE-owned reference element shows the exact generated XML shapes and mapping semantics. The Platform owns only the selections above and passes them to model generation.
Create Weighting Files from Metadata (3.2.0)
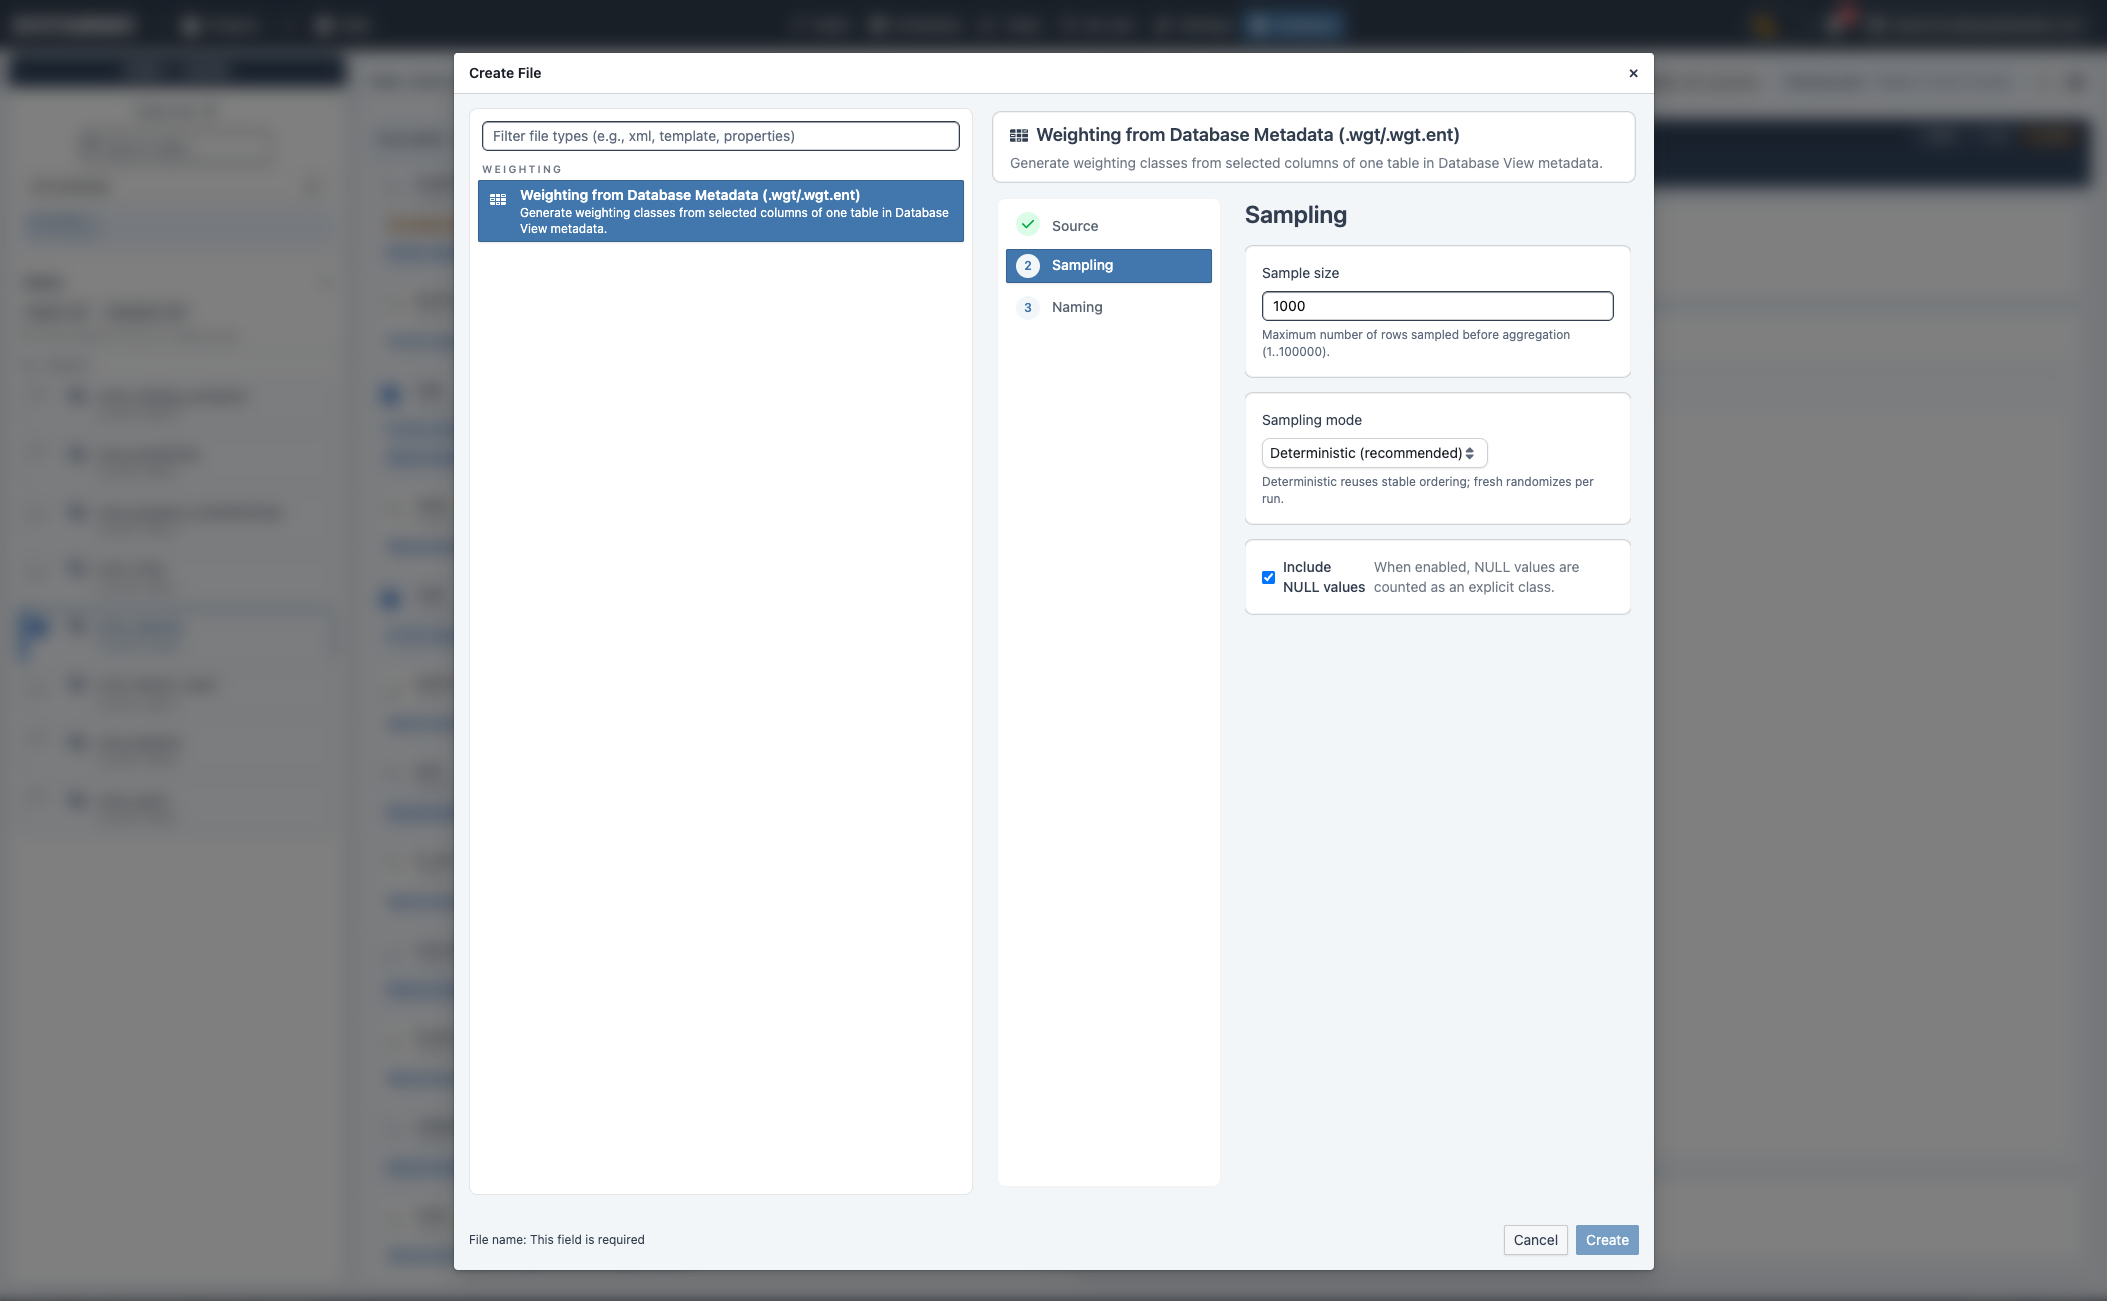
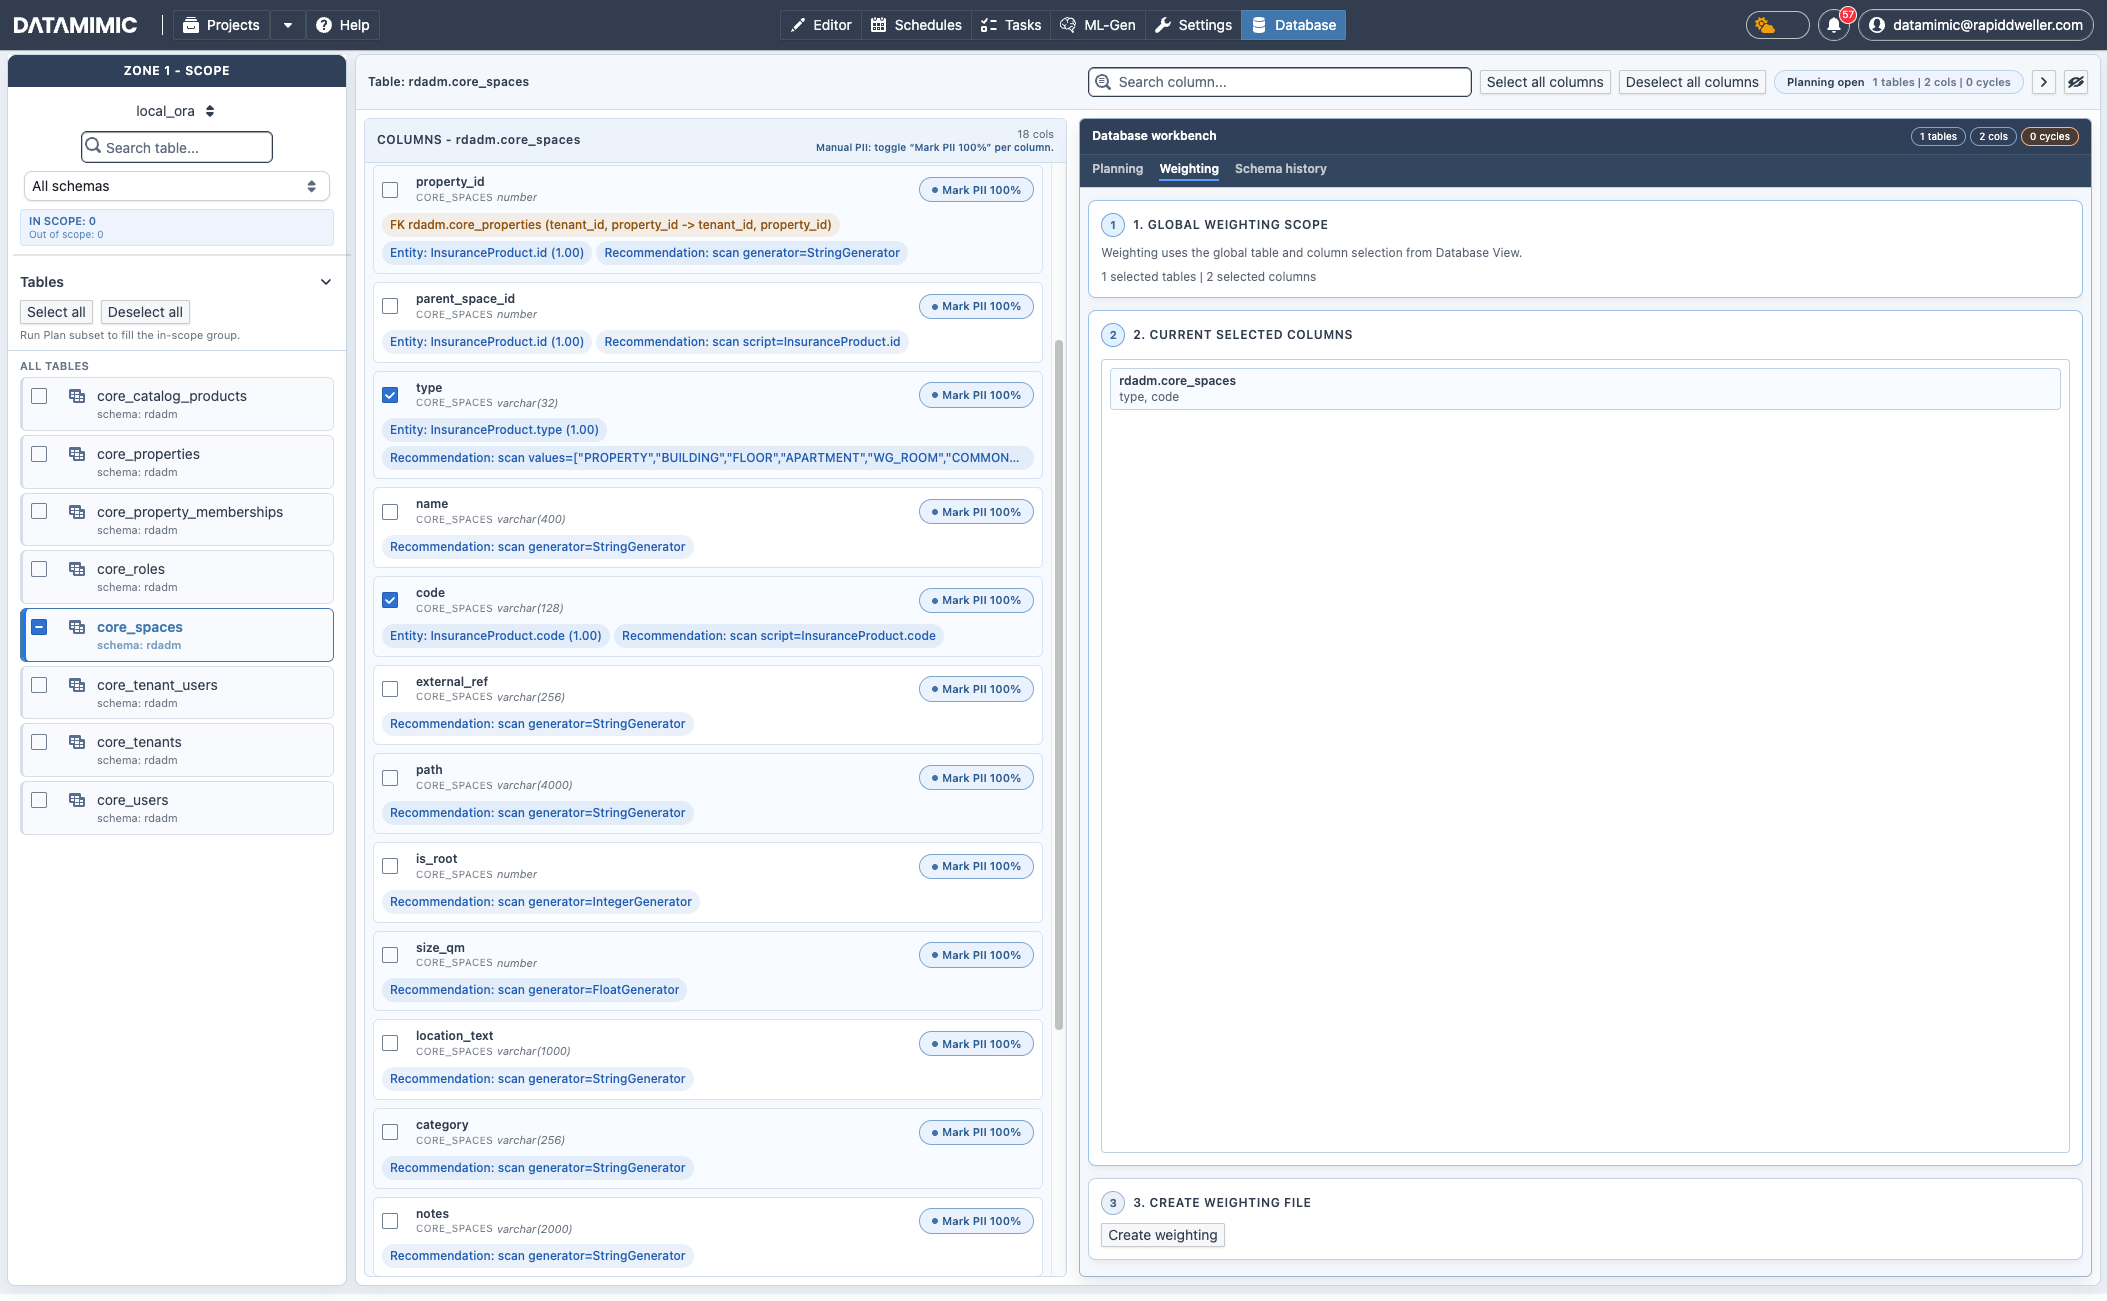
- Switch to Database workbench → Weighting to create weighting artifacts from selected metadata.
- Select exactly one table and at least one column:
- 1 selected column →
.wgt.csv - 2+ selected columns →
.wgt.ent.csv - Sampling options:
sample_size(default:1000)sampling_mode:deterministicorfreshinclude_nulls: include/exclude NULL as an explicit class- Weighting values are written as normalized factors (
count / sampled_rows) to keep distributions comparable across sample sizes.
Schema History and Drift Visibility
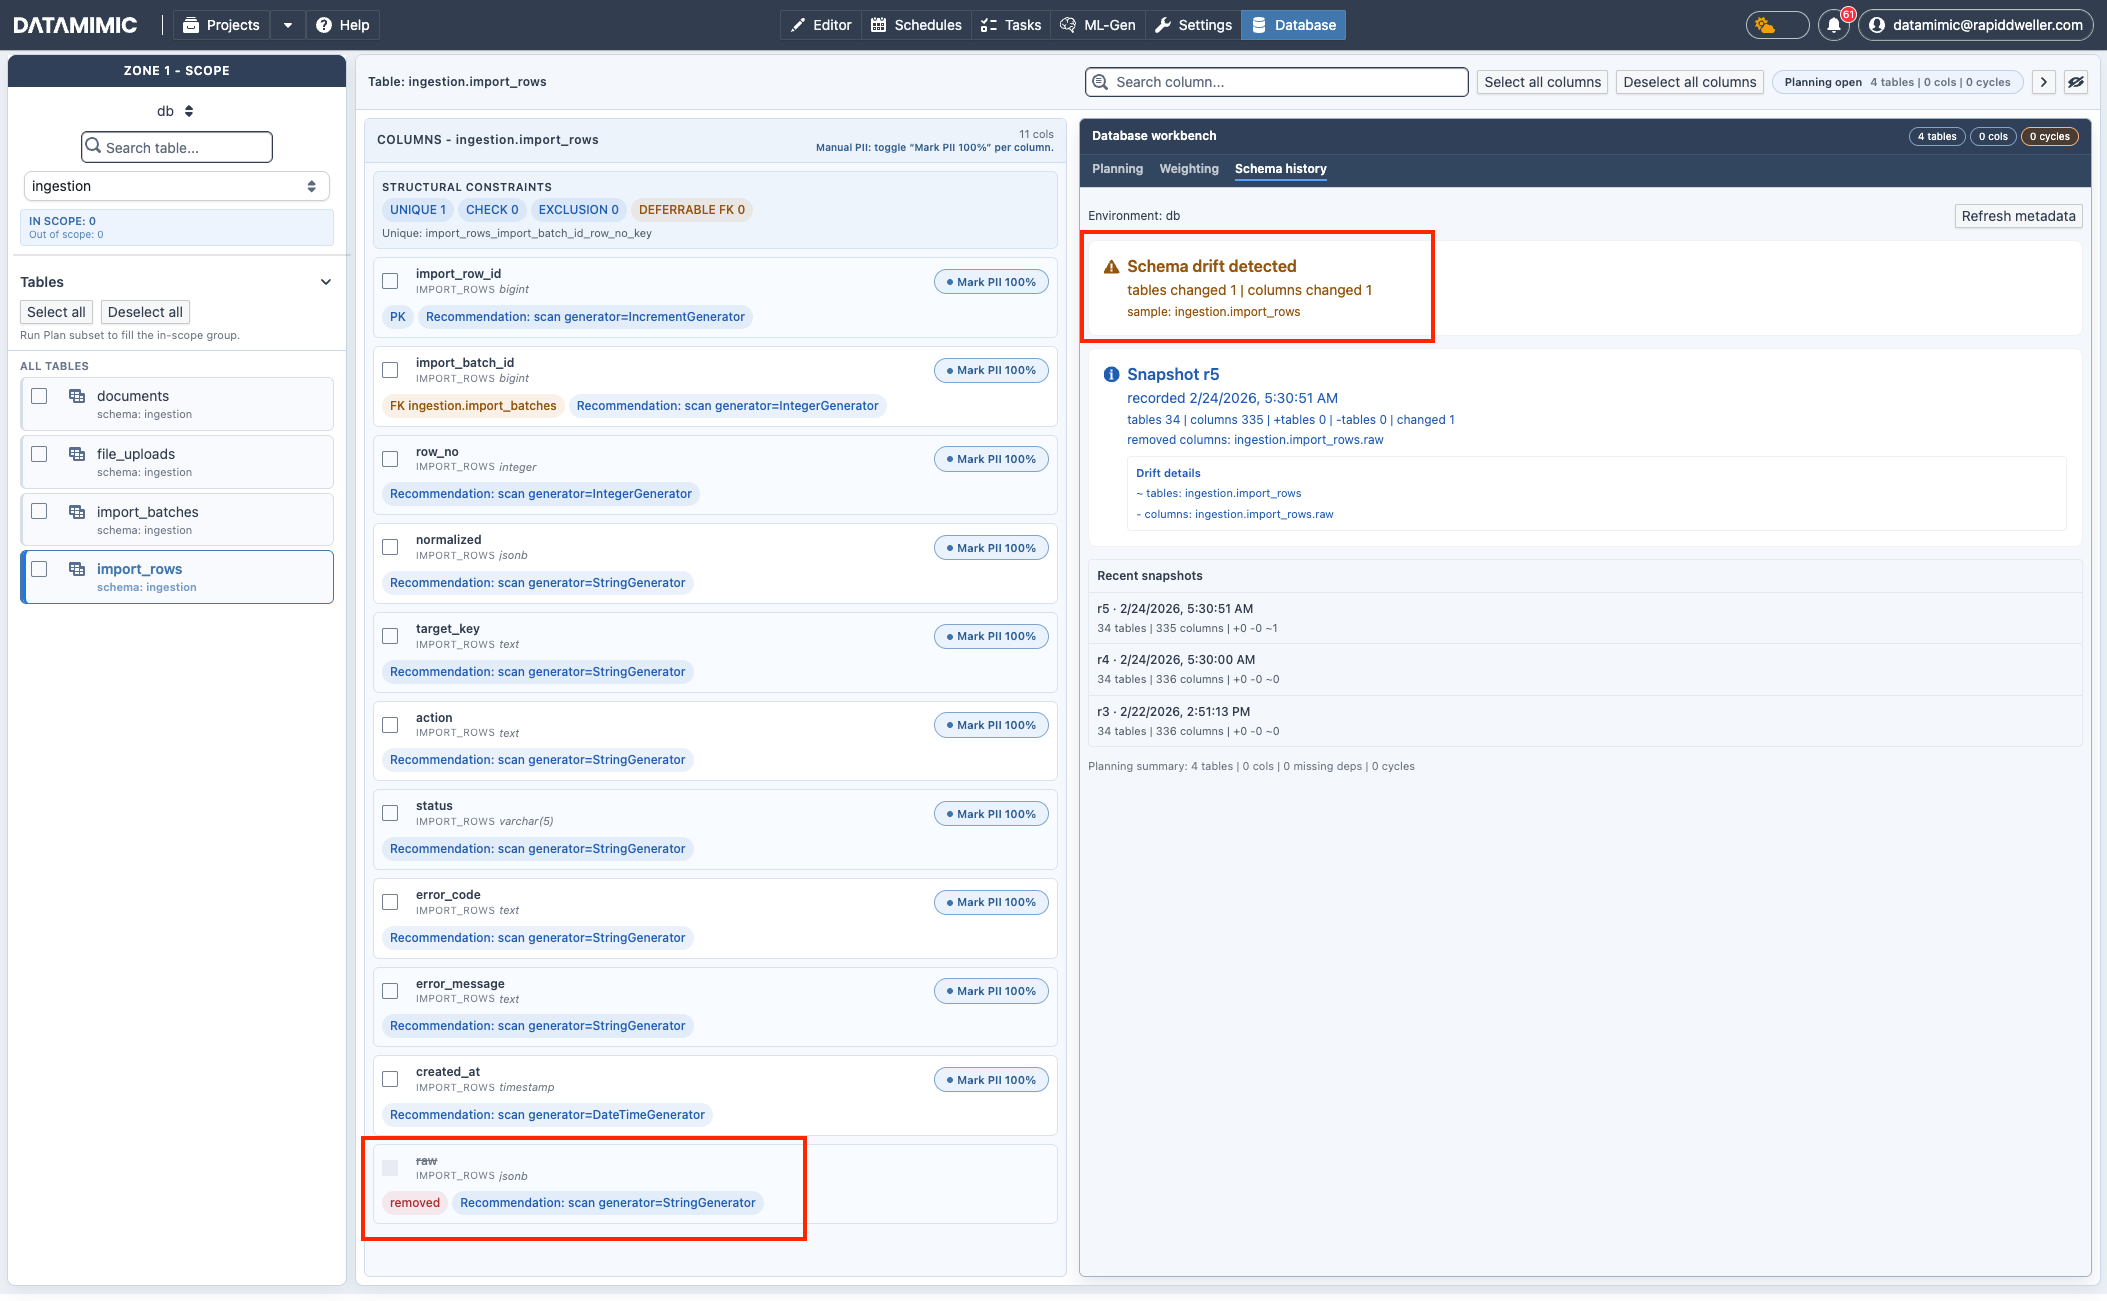
- Use Database workbench → Schema history to review metadata drift across snapshots.
- Drift details (changed tables/columns) help validate whether subset planning or regeneration is required.
After selecting your subset:
Configure a model
- Run Plan subset and review dependencies.
- Click Configure model.
- Select Synthetic data model, De-identification model, or ML training model.
- Set the source, and set a target database for a de-identification model.
- Optionally apply the personal-data preselect, set the model file name, and configure relationship source or schema-qualified names when available.
- Review and create. The XML file opens in the Editor; it is not automatically included or executed.
From an ML Training Model to ML Generator View
After creating an ML training model from Database View:
- Execute the generated DSL model so
<ml-train>can train and persist ML generator versions. - Open ML Generator View.
- Select the generated model and inspect KPI/quality status.
- Choose a version and set it as default when approved.
- Reuse the model in DSL with
source="ml://<model_name>".
Large training scopes can be long-running and may require higher runtime resources (CPU/RAM and, depending on setup, GPU-enabled workers).
Create a weighting file
- Select exactly one table and relevant column(s) in Database View.
- Open the Weighting tab.
- Click Create weighting.
- Set filename and sampling options (sample size, mode, include NULLs).
- Review and create:
.wgt.csvfor single-column weighting.wgt.ent.csvfor multi-column entity weighting
For a full walkthrough, see Auto-Generate Model from Database.