Workbench
Warning
The current page still doesn't have a translation for this language.
But you can help translating it: Contributing.
Overview
The Workbench helps you turn a connected source into a reviewed DATAMIMIC model. Choose an environment, inspect its structure, make the decisions that belong to that source, and configure a model. It has three source-specific modes:
| Environment type | Mode | Primary workflow |
|---|---|---|
| Relational database | Database | Select a table scope, validate dependencies, then configure a model. |
| MongoDB | Mongo | Scan one collection, review its snapshot, then configure a model. |
| Object storage | Object Storage | Scan one supported file or Parquet dataset, review its structure, then configure a model. |
Open Workbench from the project navigation and select an environment. Create the matching environment first in Settings → Environments.
A generated model is not automatically executed
The Workbench creates a project file and opens it in the Editor. It does not automatically modify datamimic.xml, add an include, or start a run. Decide deliberately whether the model belongs in your project composition, then use the include reference and the Editor's Generate action when you are ready.
Database mode
Database mode is for planning a relational model from scanned metadata. On a wide screen, Scope, Columns, and Database workbench can be open together. You can also focus or collapse a pane without losing your current choice.
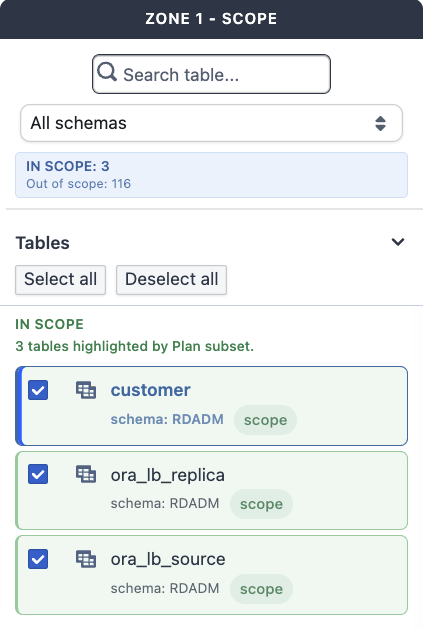
Plan a database model
- Scan metadata for the selected database environment if it is not current.
- In Scope, use the table checkbox to add or remove a table from the model scope. Use the adjacent table control to open its columns; opening a table does not change the scope.
- In Columns, review the selected table. Key and relationship markers, personal-data candidates, entity suggestions, and compact recommendations such as
Script · Person.email,Generator · StringGenerator, orDefault · Preservegive context for the generated model. Use Previous and Next to move through the planned tables after planning. - For known personal data, use Mark as personal data. Use Remove manual mark only to remove your explicit mark. The displayed recommendation is still a recommendation, not a catalog rule.
- Choose Plan subset. It validates dependencies and applies the required table closure to the scope. Review the verdict and its counts in Validate dependencies. Resolve or explicitly acknowledge any required dependency decision before model configuration becomes available.
- Choose Configure model and select the appropriate outcome:
| Model type | What the generated model does |
|---|---|
| Synthetic data model | Reads the selected source metadata and does not write to a target database. |
| De-identification model | Reads source data and writes de-identified data to the explicitly selected target database. |
| ML training model | Reads the selected source metadata and does not write to a target database. |
- In a de-identification model, the wizard can preselect personal-data candidates in the planned scope using the project threshold. Review that selection before creating the model.
- Name and create the model. The new XML file opens in the Editor.

Use Weighting only to create weighting artifacts from the existing selected database scope. Use Schema history to inspect metadata snapshots and drift; it does not replace the current planning decision.
For database-specific details, including metadata refresh and relationship-source options, see Database View.
Mongo mode
Mongo mode reviews one bounded collection snapshot at a time. The scan never changes the collection.
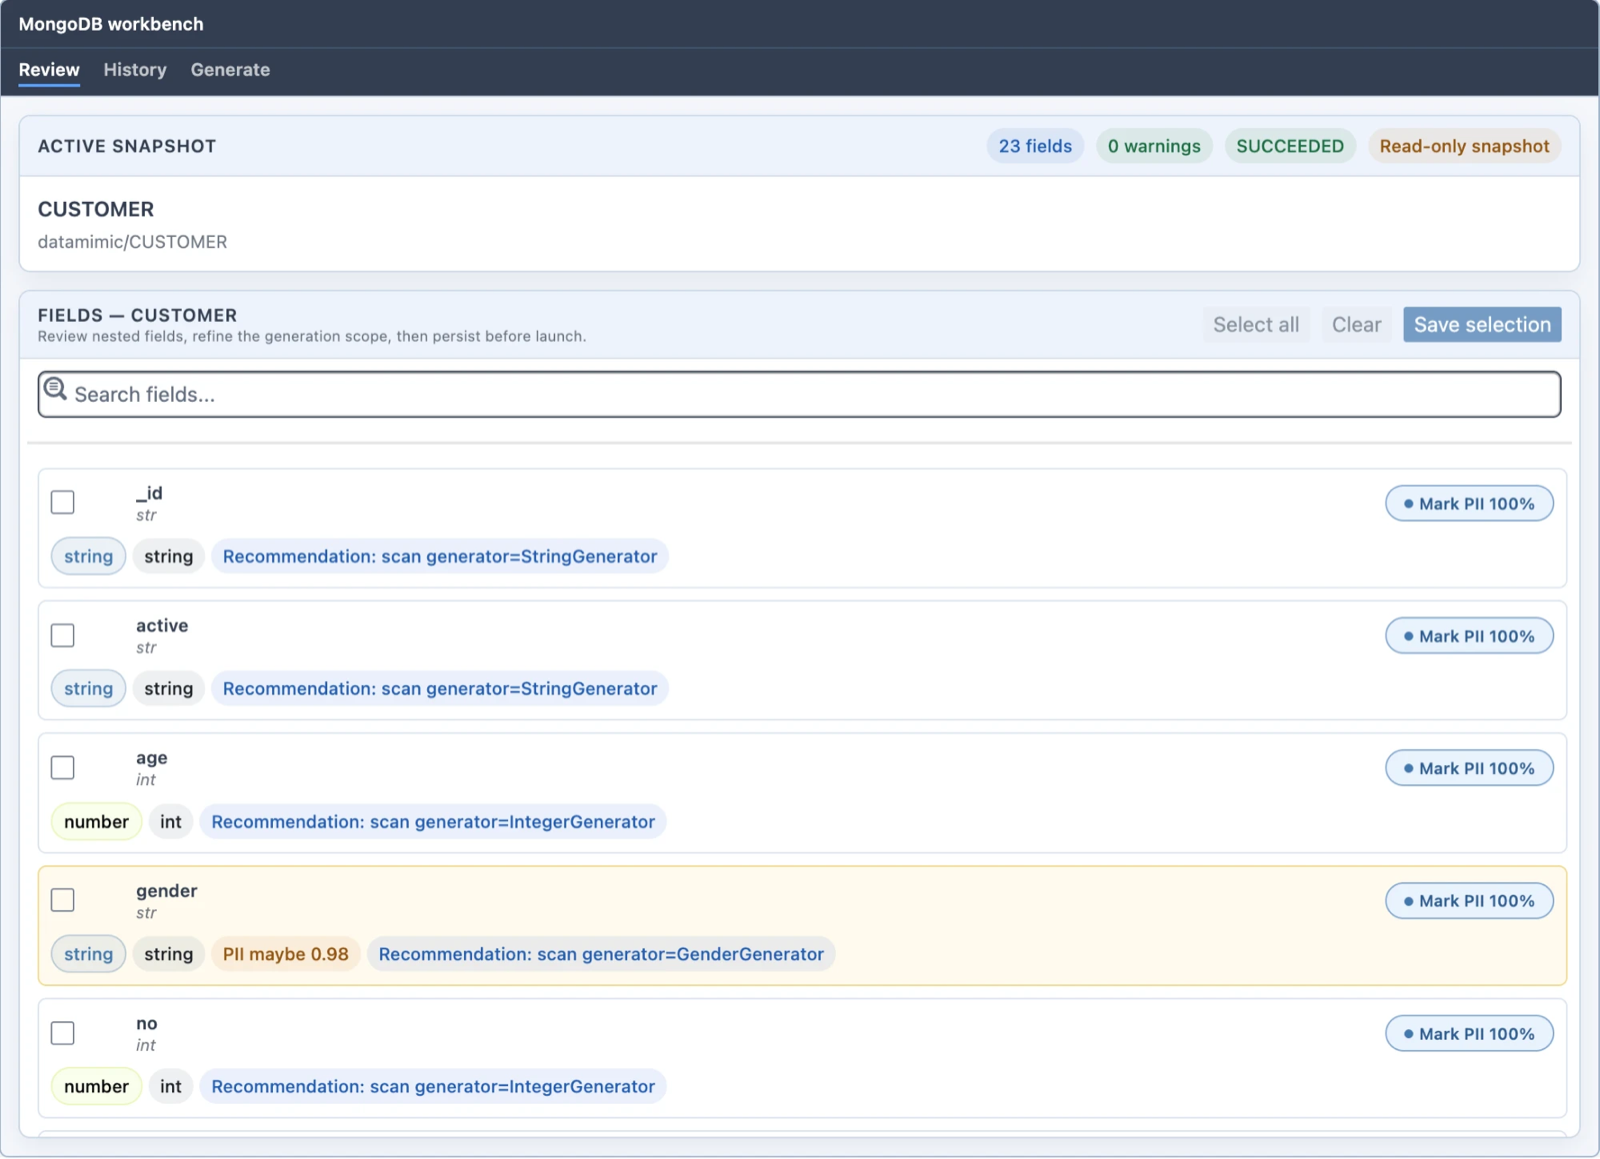
Scan and review a MongoDB collection
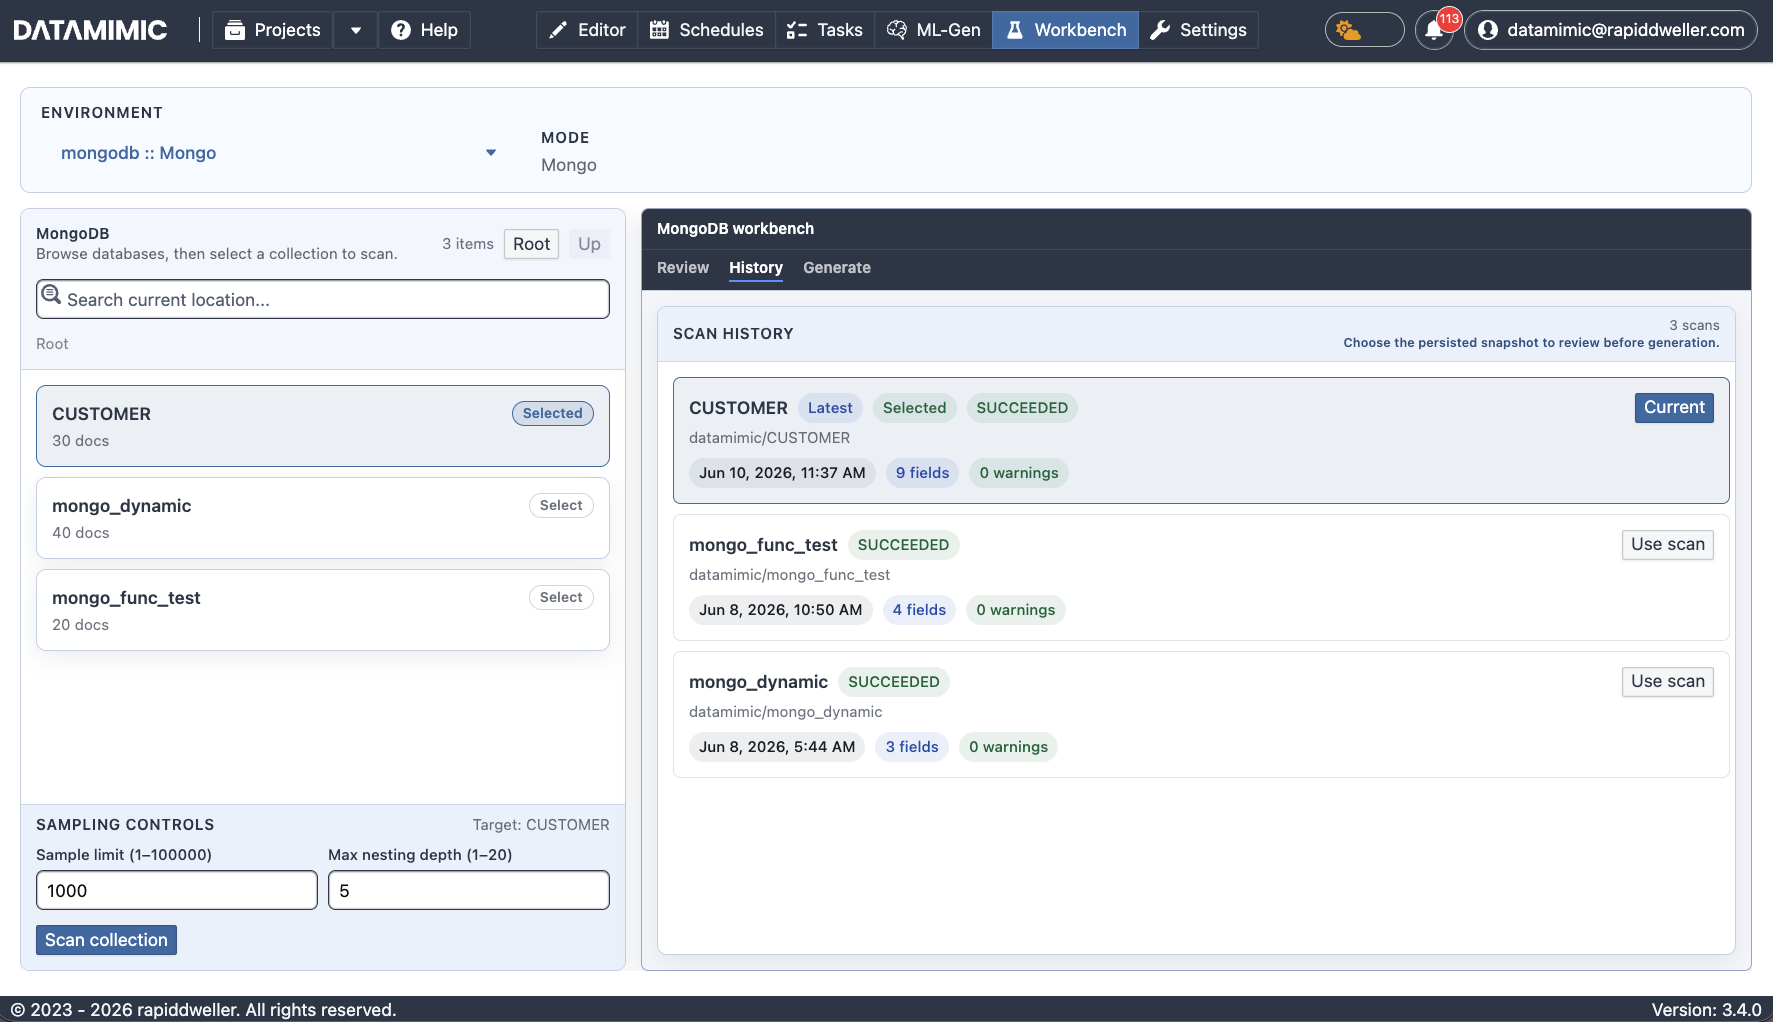
- Browse databases, open the required database, and select a collection. The browse row independently shows the scan target, the collection currently under review, and its latest snapshot status.
- Set Sample limit and Max nesting depth, then choose Scan collection. The button names the selected target; its full locator remains available as a tooltip.
- Read the current snapshot context above the review: source, locator, time, field count, sample count, warning count, and status.
- In Review, select the fields to include. Search, filters, Expand all, Select all, and Clear help with larger documents. Save changes with Save selection before configuring a model.
- For scored leaf fields, confirm Personal data or choose Not personal data. The decision records its actor and time and can be undone. Unscored fields show their evaluation state instead of a decision control.
- Treat nesting warnings as a scope decision: accept the warning when the current sample is sufficient, or use the offered re-scan depth when you need more structure.
- Choose Scan history to review persisted snapshots. Each entry shows source, locator, timestamp, field count, warnings, and Latest, Superseded, or Failed status. Choose Use scan to load a snapshot; superseded snapshots are read-only.
- Choose Generate and then Configure model. Select the model type and filename in the wizard. For a MongoDB De-identification model, select a target environment and a target collection different from the source collection, then enter the record count. The source
_idis preserved. - Create the model. The new XML file opens in the Editor.

Object Storage mode
Object Storage mode reviews structure from a single supported file or a Parquet dataset. It deliberately has no personal-data review controls: the source is a scanned object, not a connected source collection for data de-identification.

- Browse to a supported CSV, JSON, or Parquet file. Select a file, or open a directory to scan it as a Parquet dataset. Unsupported formats remain disabled and show the reason on hover.
- Set the source-aware limits: CSV uses Row limit; JSON uses Record limit and Max nesting depth; Parquet uses Row limit and Max partition size.
- Choose the scan action named for the selected file or dataset.
- In Review, select the fields required by the model and use Save selection. Recommendation badges describe the inferred action; their full token is available on focus or hover. There are no personal-data decisions in this mode.
- Use Scan history to select the persisted snapshot you want to review or generate from.
- Choose Generate and then Configure model. Create the model to open it in the Editor.
Continue in the Editor
After a successful model creation, the Workbench switches to Editor and selects the created file.
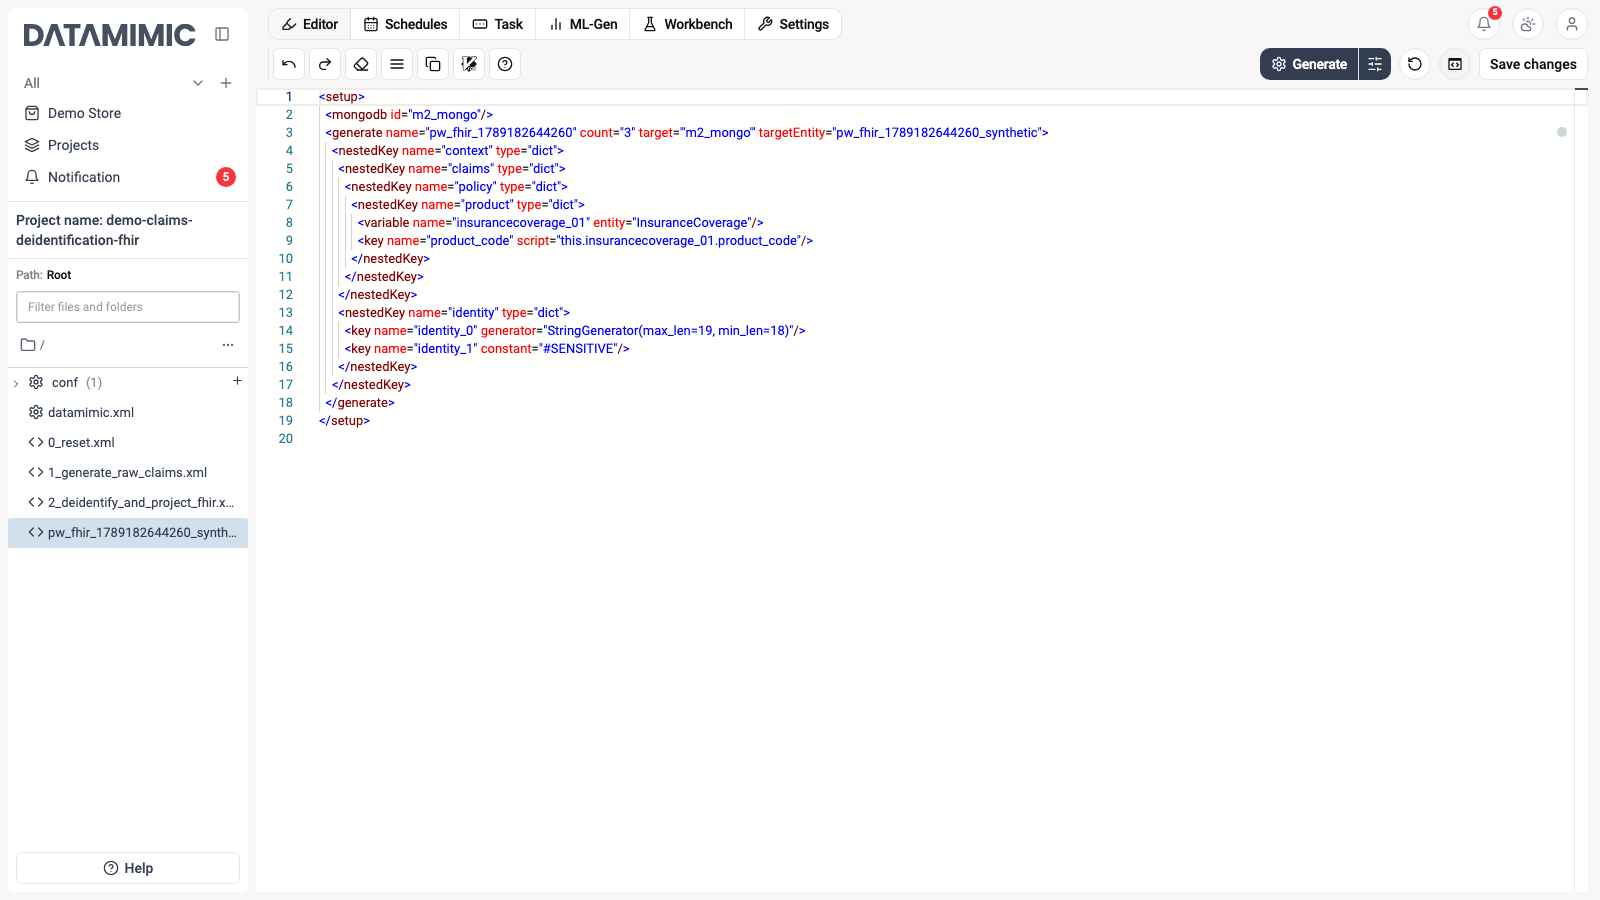
Review the file, decide whether it should be included from datamimic.xml, and then start a project run from the Editor. The include reference is the authoritative documentation for XML composition; this page documents only the Workbench workflow.