Auto-Generate Model from Database
Database View is the central workspace for creating model and weighting artifacts from scanned database metadata.
As of 3.2.0, the flow is organized in the Database workbench tabs (Planning, Weighting, Schema history) with dedicated create actions.
Steps
1. Ensure you have a project
Start with an existing project or create a new one (for example, an empty project).
2. Configure a database environment
- Open Settings → Environments.
- Add or edit your database environment.
- Ensure credentials and connectivity are valid.
3. Scan metadata
- Run Scan Metadata for the selected environment.
- If metadata is outdated, run Reset Metadata and scan again.
- Metadata scan includes all accessible schemas for the selected connection.
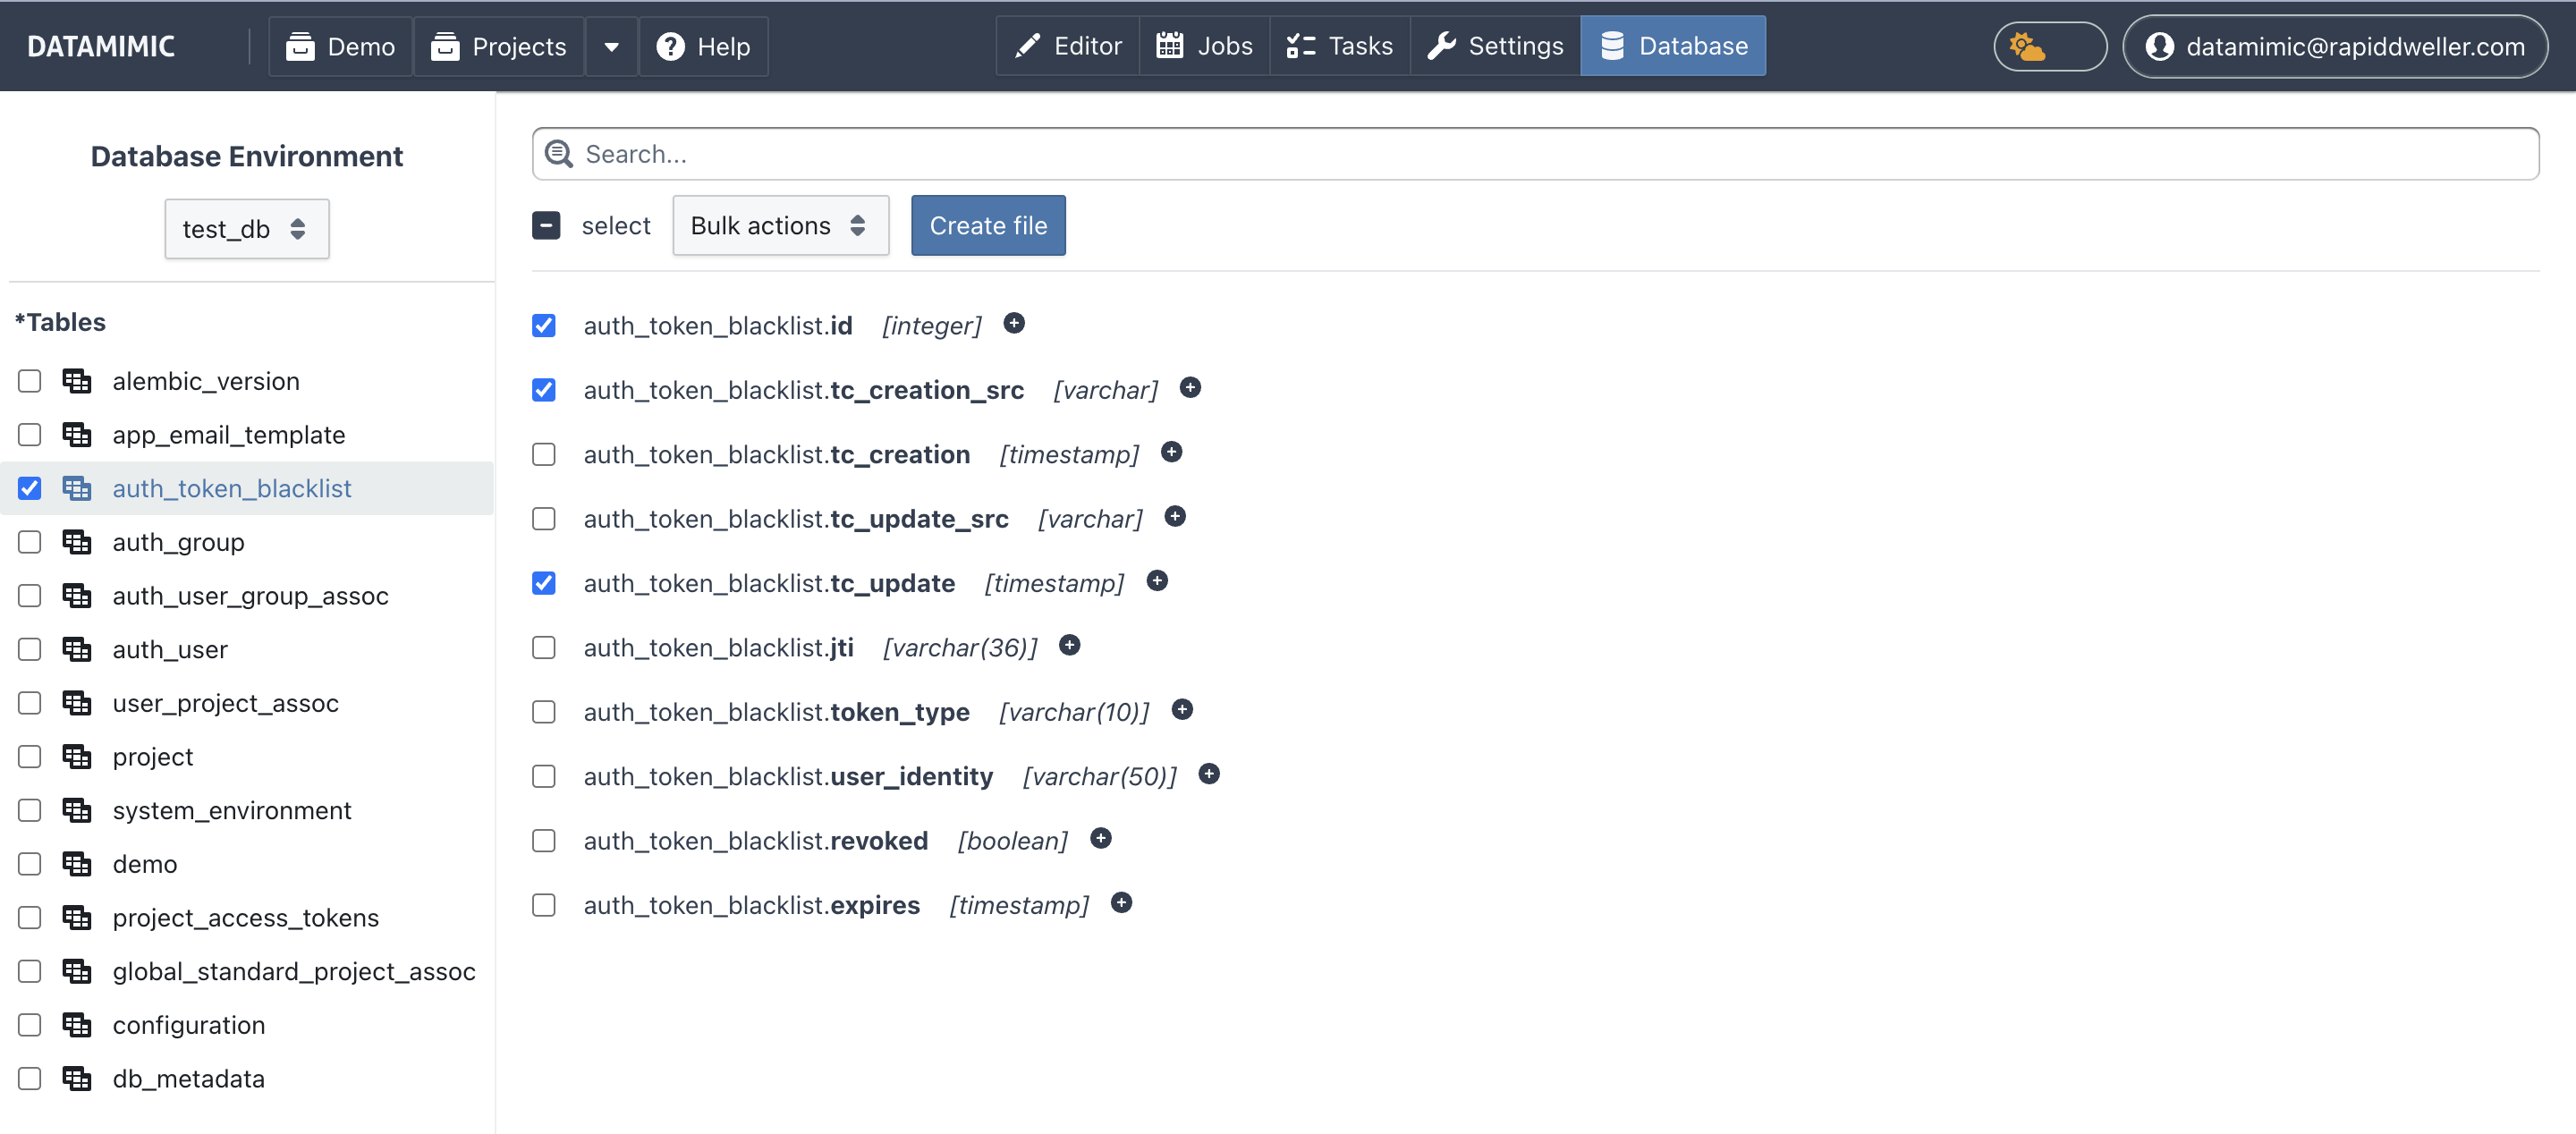
4. Open Database View and plan your subset
In Database View, work from left to right:
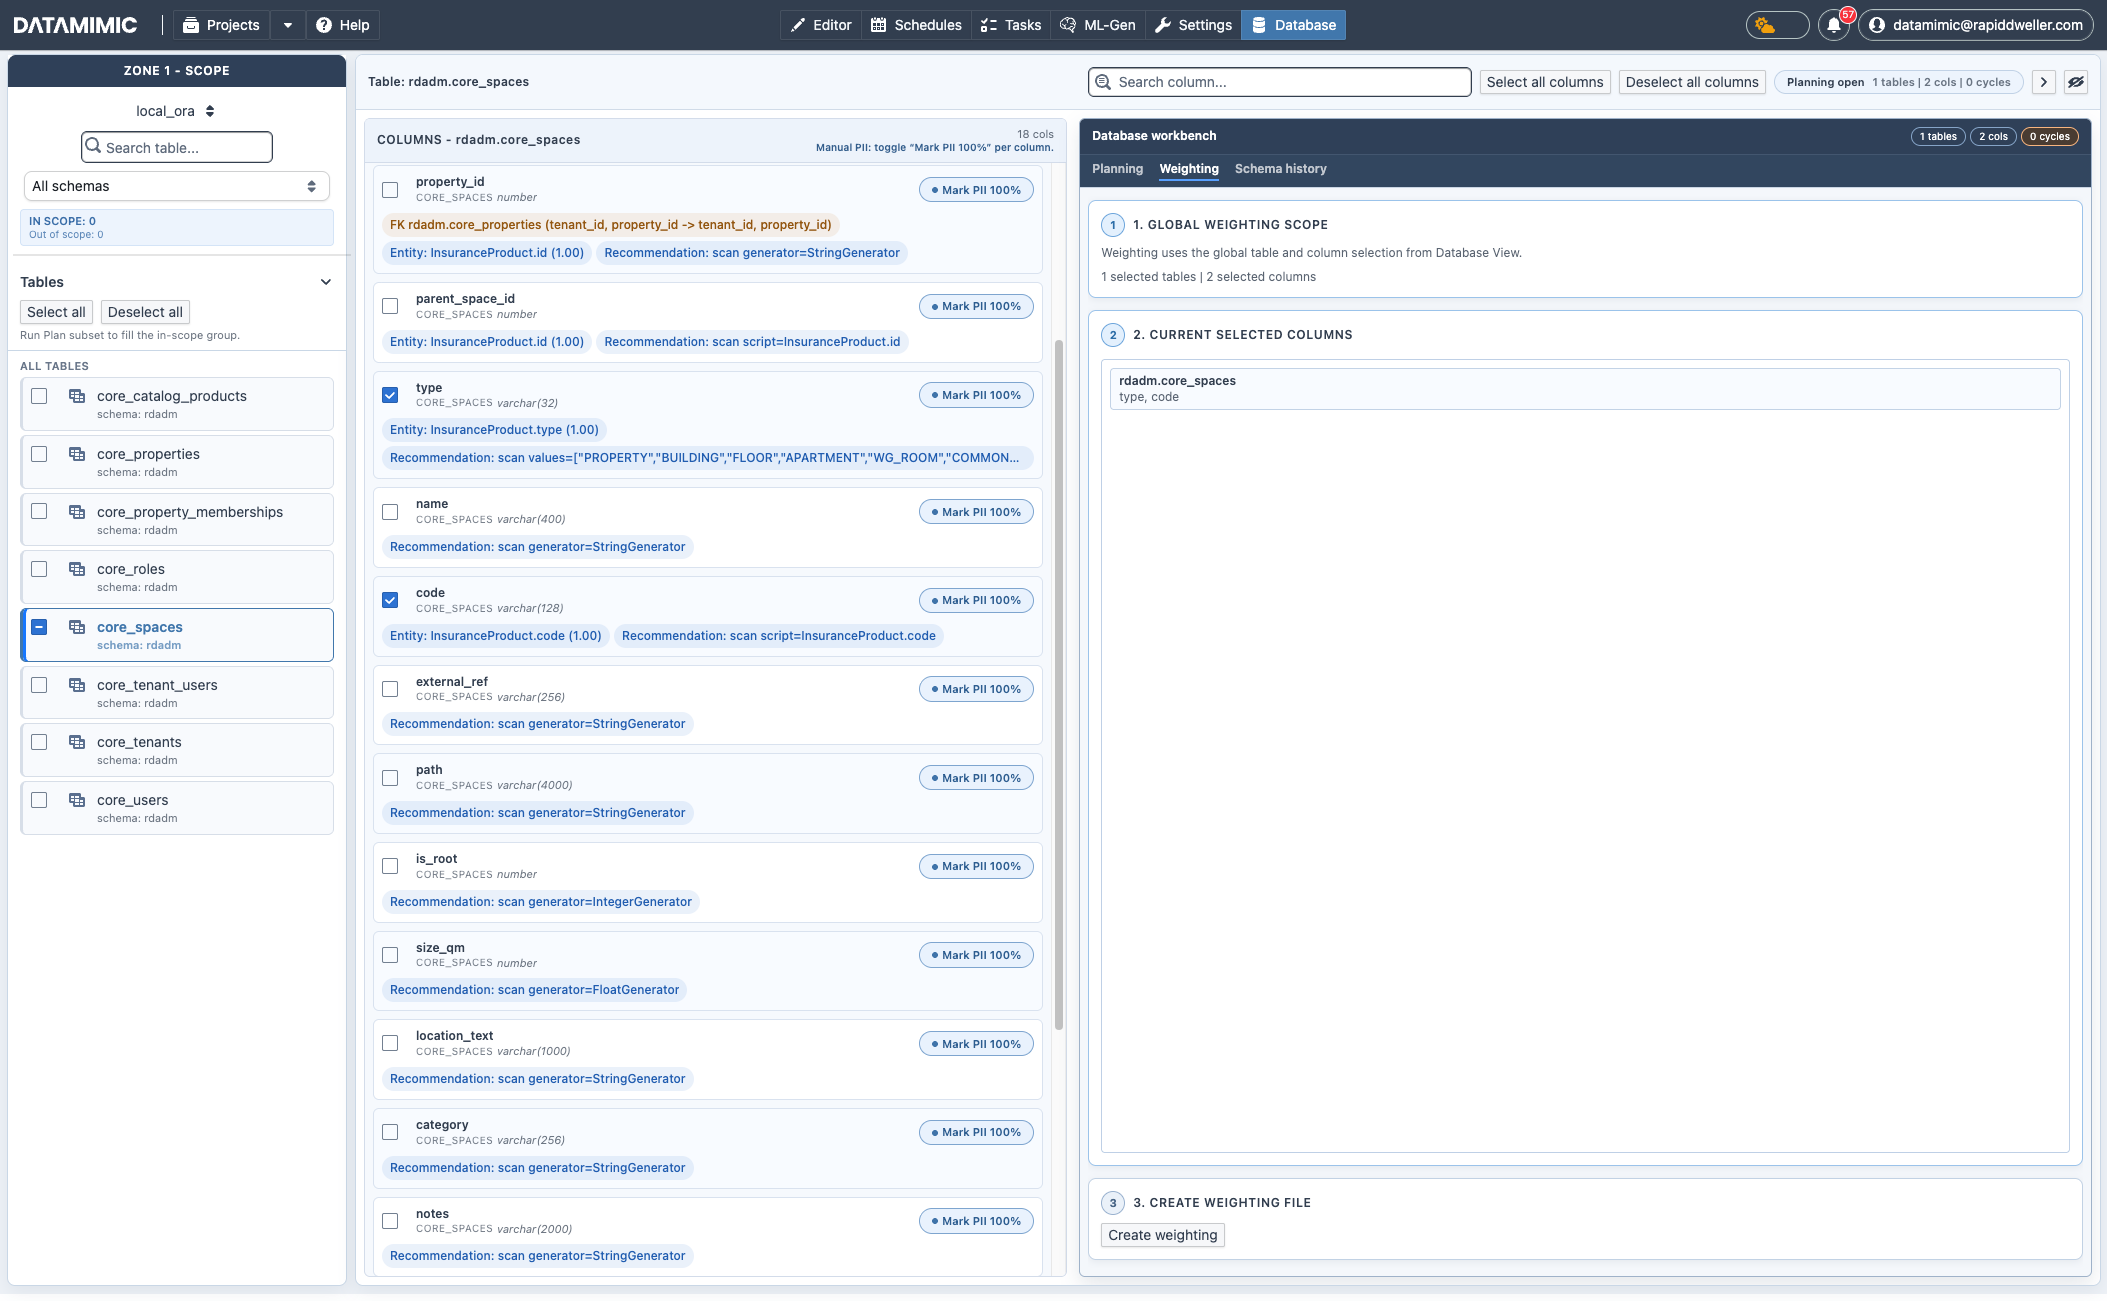
- Zone 1 - Scope: choose environment, schema filter, and tables.
- Columns panel: review and select columns.
- Database workbench → Planning: run Plan subset, validate dependency closure, and check subset preflight.
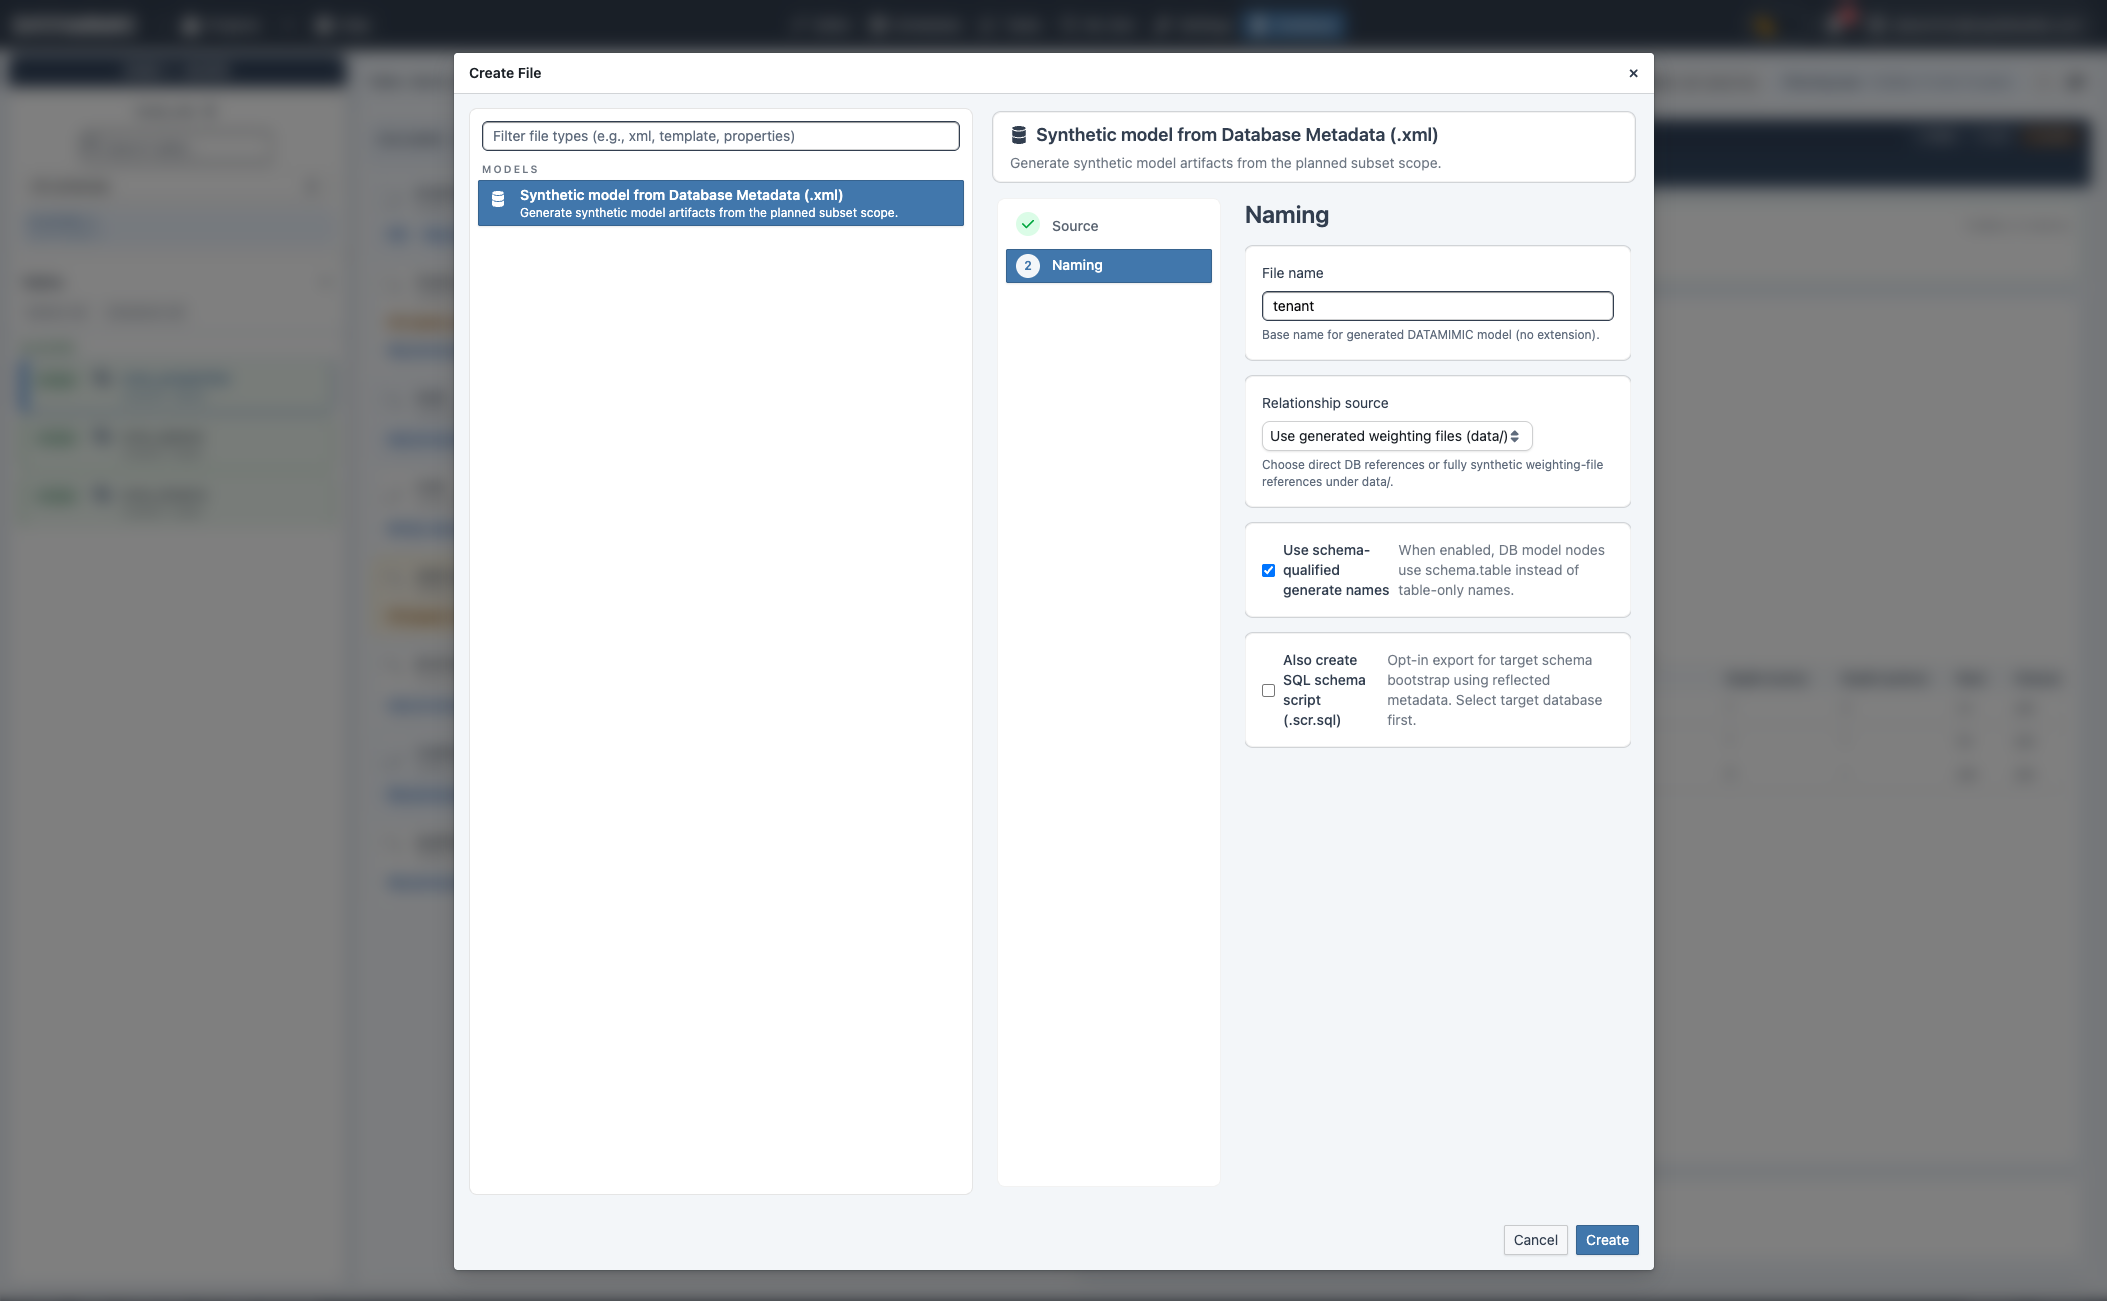
5. Create model artifacts from the workbench
Use Generate artifacts in the Planning tab.
A. Create Synthetic model (.xml)
- Click Create Synthetic.
- Enter a model file name.
- Set relationship source (database-backed or generated weighting files under
data/). - Optionally enable schema-qualified generated names.
- Optionally enable SQL schema script export (
.scr.sql) if your target setup requires it.
B. Create Anonymize model (.xml)
- Click Create Anonymize.
- Confirm source database and select target database.
- Optionally apply PII preselect before create and set threshold.
- Continue to naming and create.

C. Create ML training model (.xml)
- Click Create ML.
- Confirm source.
- Enter file name and optionally enable schema-qualified generated names.
- Create the model artifact.
- Execute the generated DSL model so
<ml-train>can train and persist ML generator versions.

Next step: after the training run completes, validate generator versions and quality metrics in ML Generator View, then reuse approved models with source="ml://..." as described in ML Generator from Database Metadata.
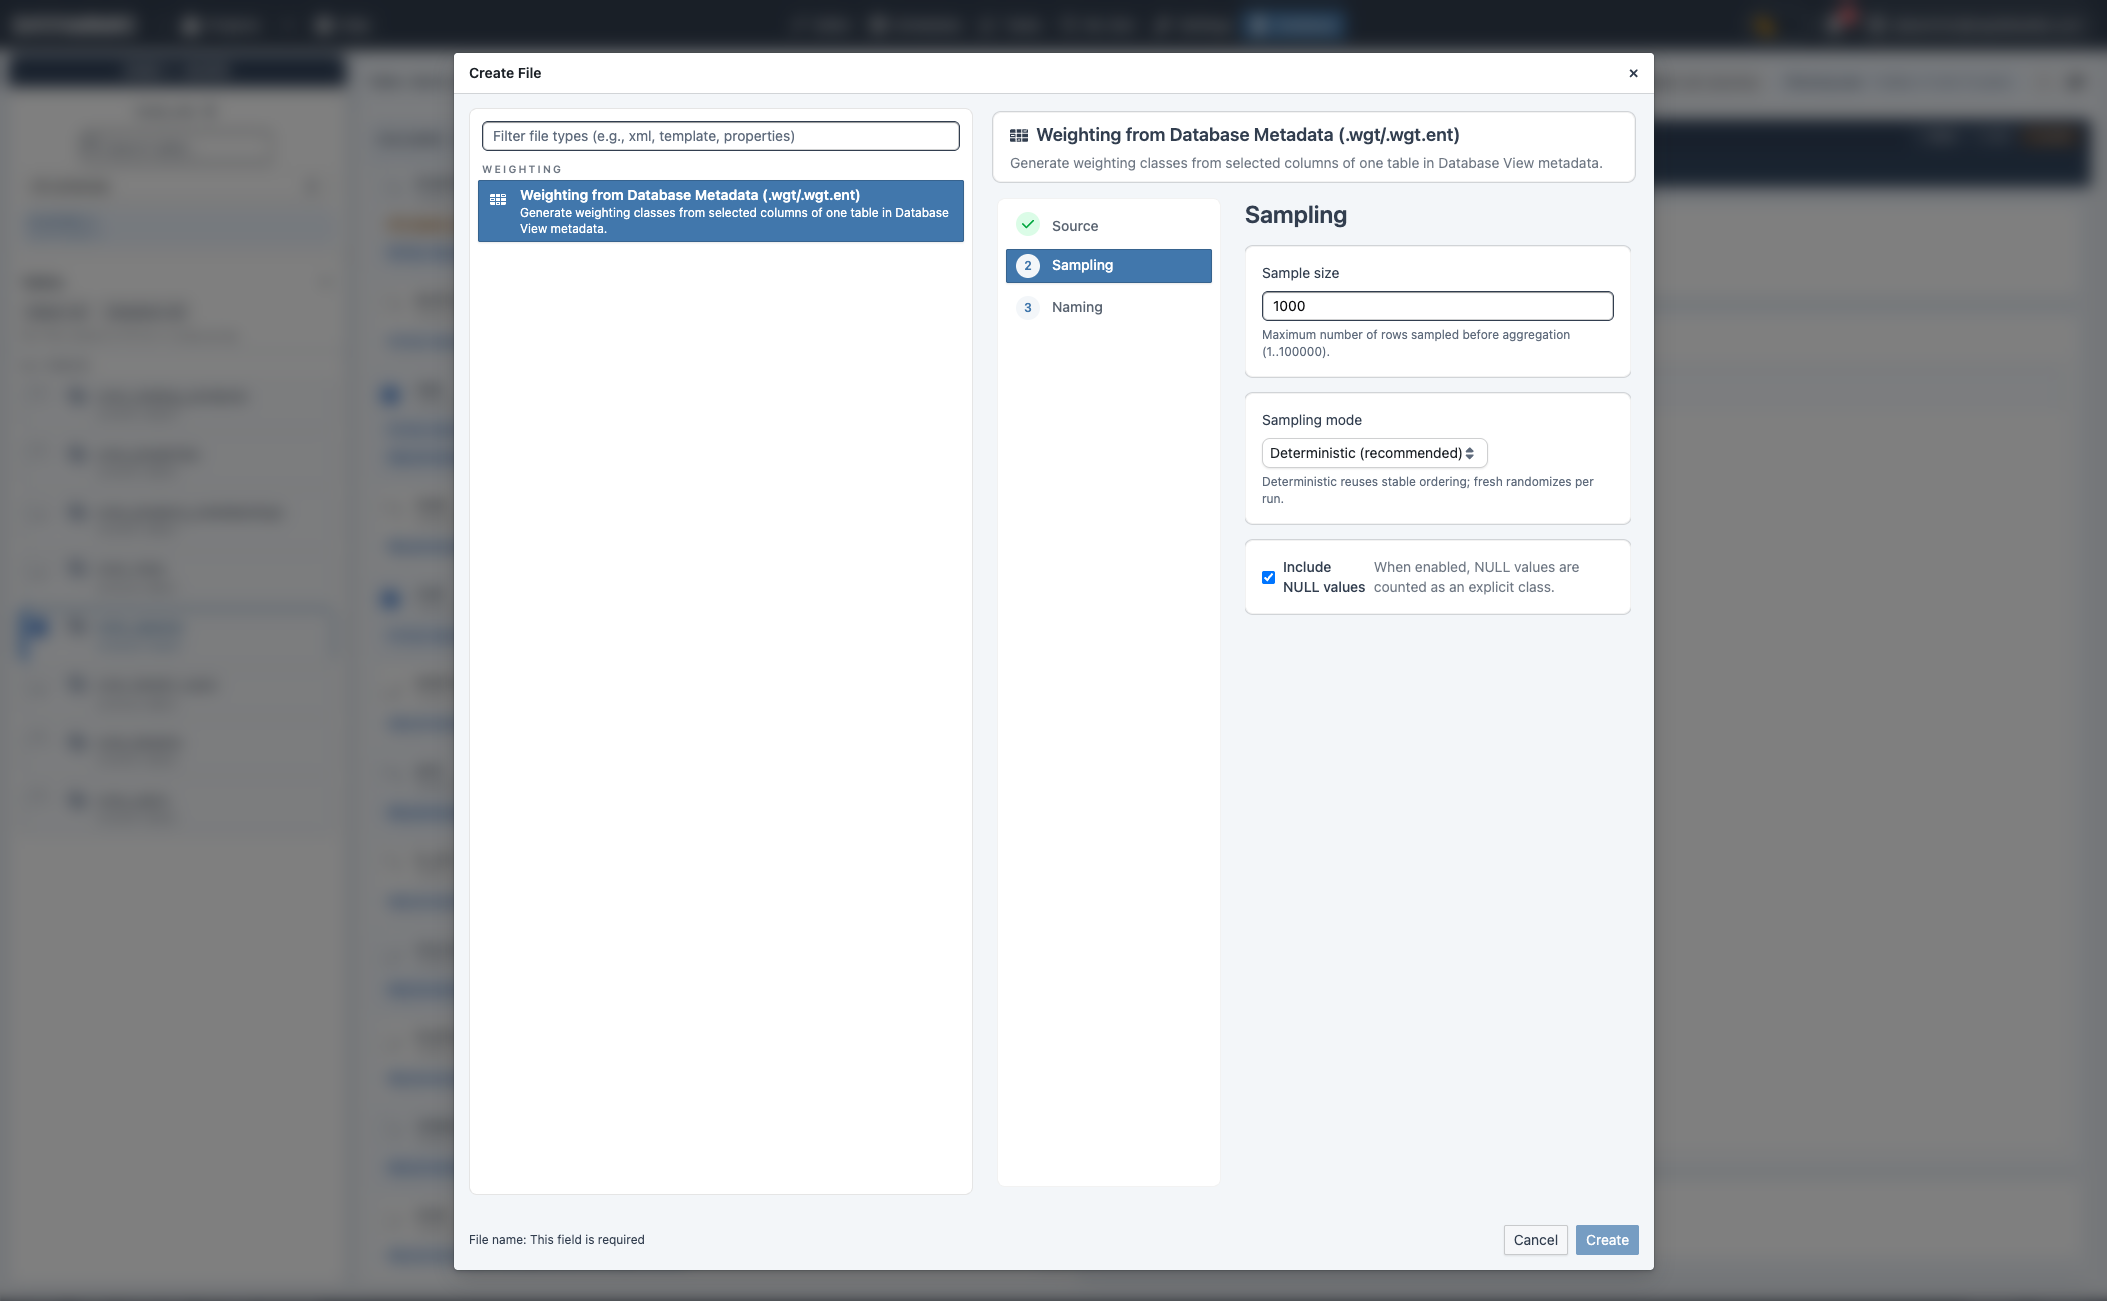
6. Create weighting artifacts in the Weighting tab
Switch to Database workbench → Weighting:
- Select exactly one table and one or more columns in the metadata scope.
- Review selected columns in the Weighting tab.
- Click Create weighting.
- Configure sampling:
sample_size(default1000)sampling_mode(deterministicorfresh)include_nulls(true/false)- Set file name and create.
Output:
- One selected column →
.wgt.csv - Multiple selected columns →
.wgt.ent.csv
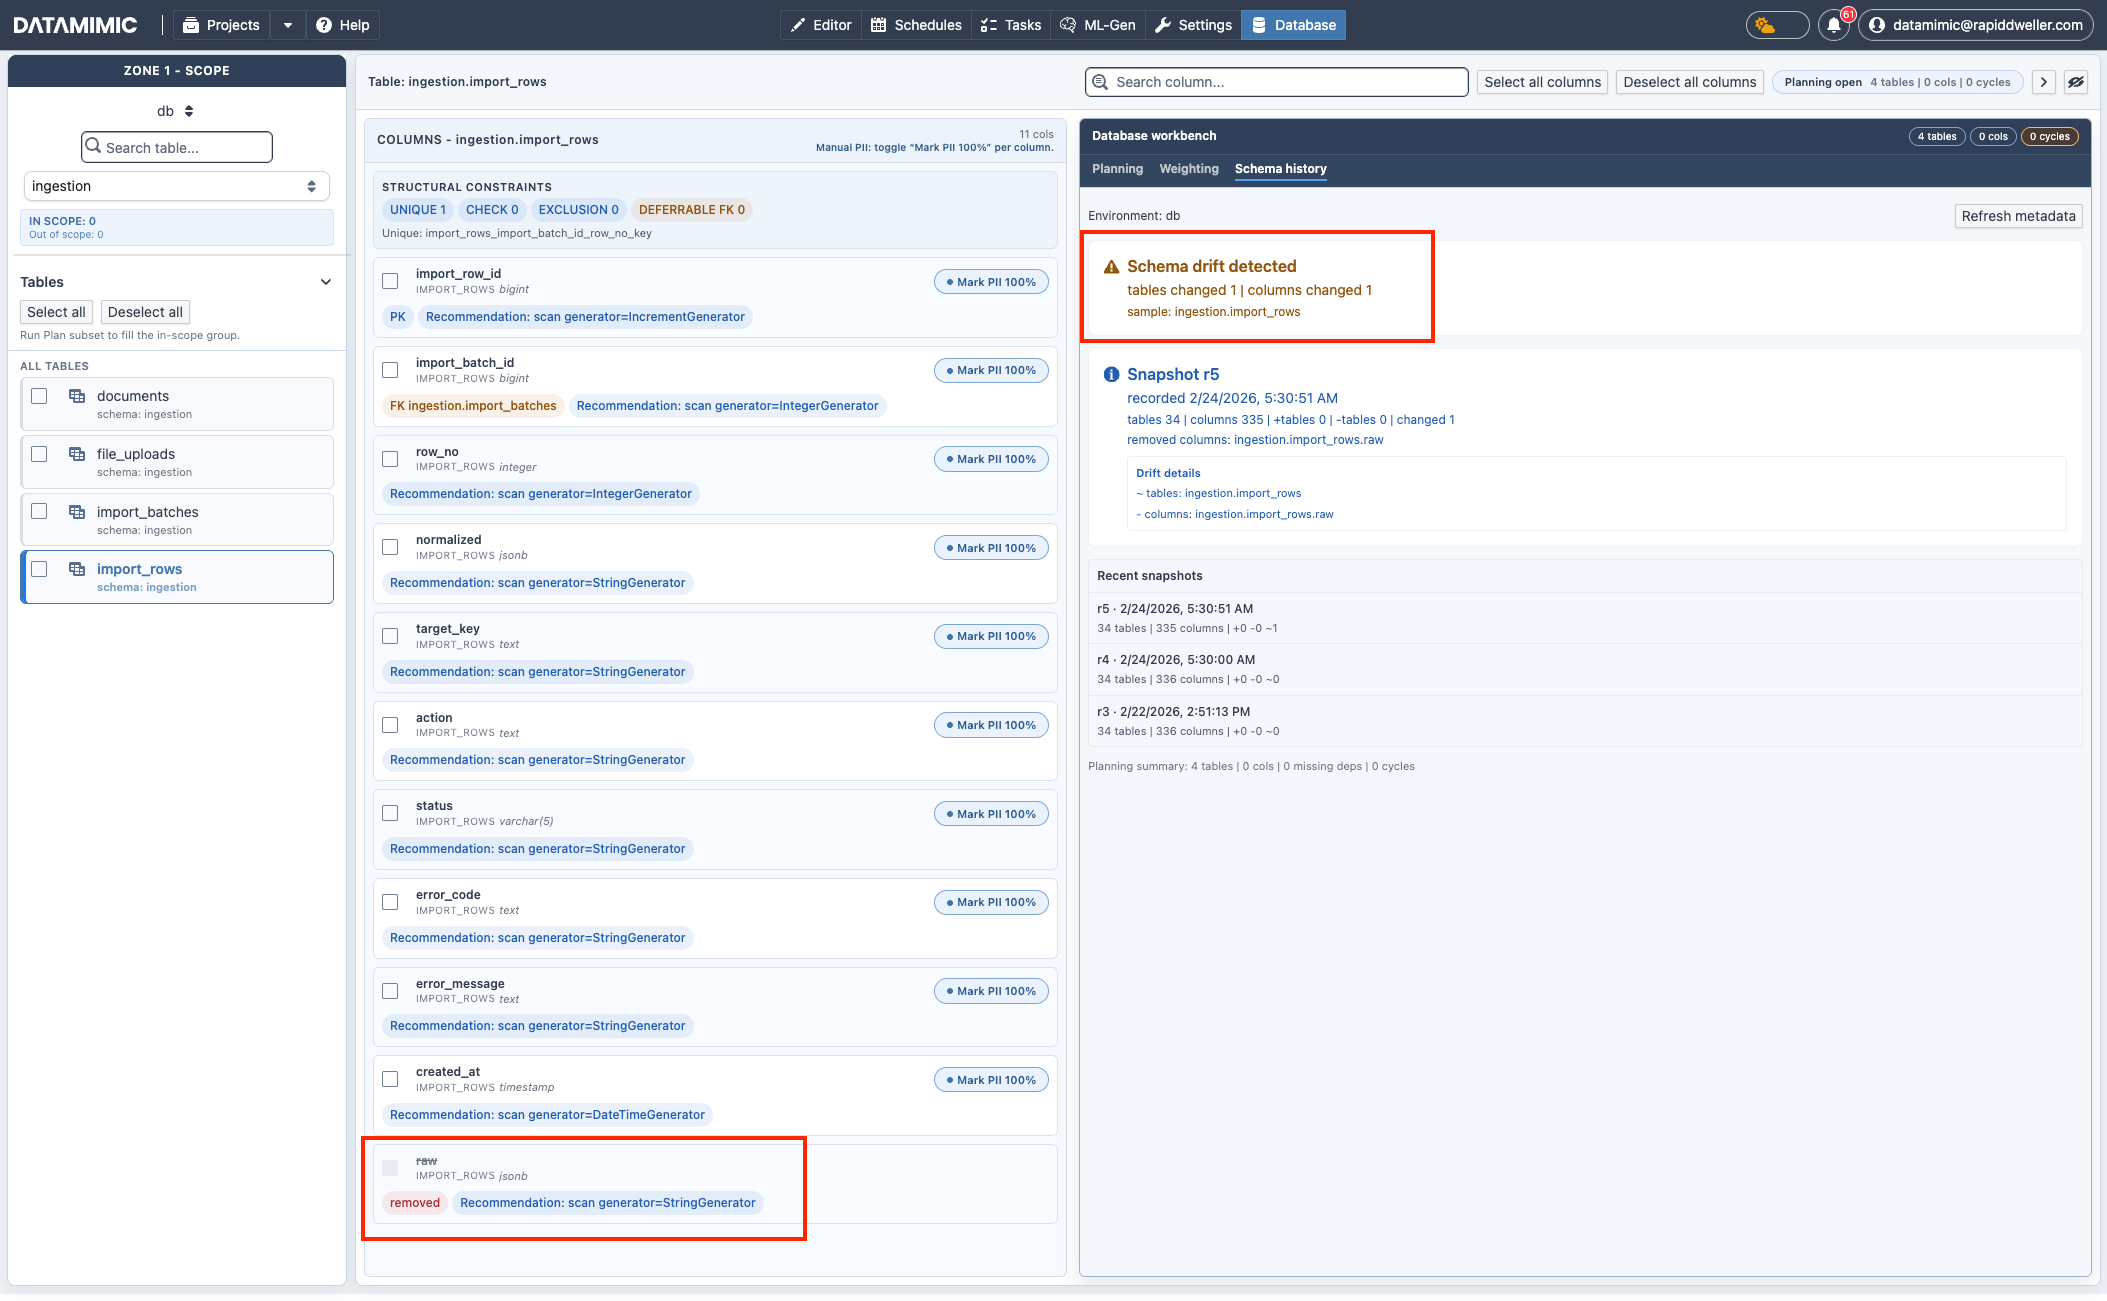
7. Review schema drift in Schema history
Use Database workbench → Schema history to review detected metadata changes across snapshots before regenerating artifacts.
8. Review and refine created artifacts
- Model flows create a new DATAMIMIC model file (
.xml). - Weighting flow creates a weighting file (
.wgt.csvor.wgt.ent.csv). - Continue refinement in the Editor (keys, generators, scripts, converters, and targets).
Typical generated <reference> outputs from database metadata flow:
1 2 3 4 | |
1 2 3 4 | |
9. Set realistic expectations for recommendations
- Database View recommendations are assistive and continuously improving.
- For complex schemas and production anonymization scenarios, expect manual adjustment of generated models.
- Use project-specific review criteria to validate PII decisions, relationship handling, and business constraints before rollout.
- Plan iterative hardening cycles as metadata or source schema evolves.
For complete <reference> behavior and mapping semantics, see Data Definition Model - Advanced Elements.