Environments
The Environments section allows you to configure various environments for your project. You can add new environments, edit existing ones, or delete environments as needed.
Environment Types
You can configure the following types of environments in DATAMIMIC:
- RDBMS: PostgreSQL, SQLite, MSSQL, MySQL, Oracle
- MongoDB: Document database built for modern apps
- Kafka: Distributed streaming and messaging platform
- Broker: RabbitMQ message broker for async task processing
- Object Storage: Scalable storage for large unstructured data
Tip
If a required environment type is missing, please get in touch with our team to enable this environment type for your account or instance.
Managing Environments
Once you have added environments, you can manage them from the Environments pane.
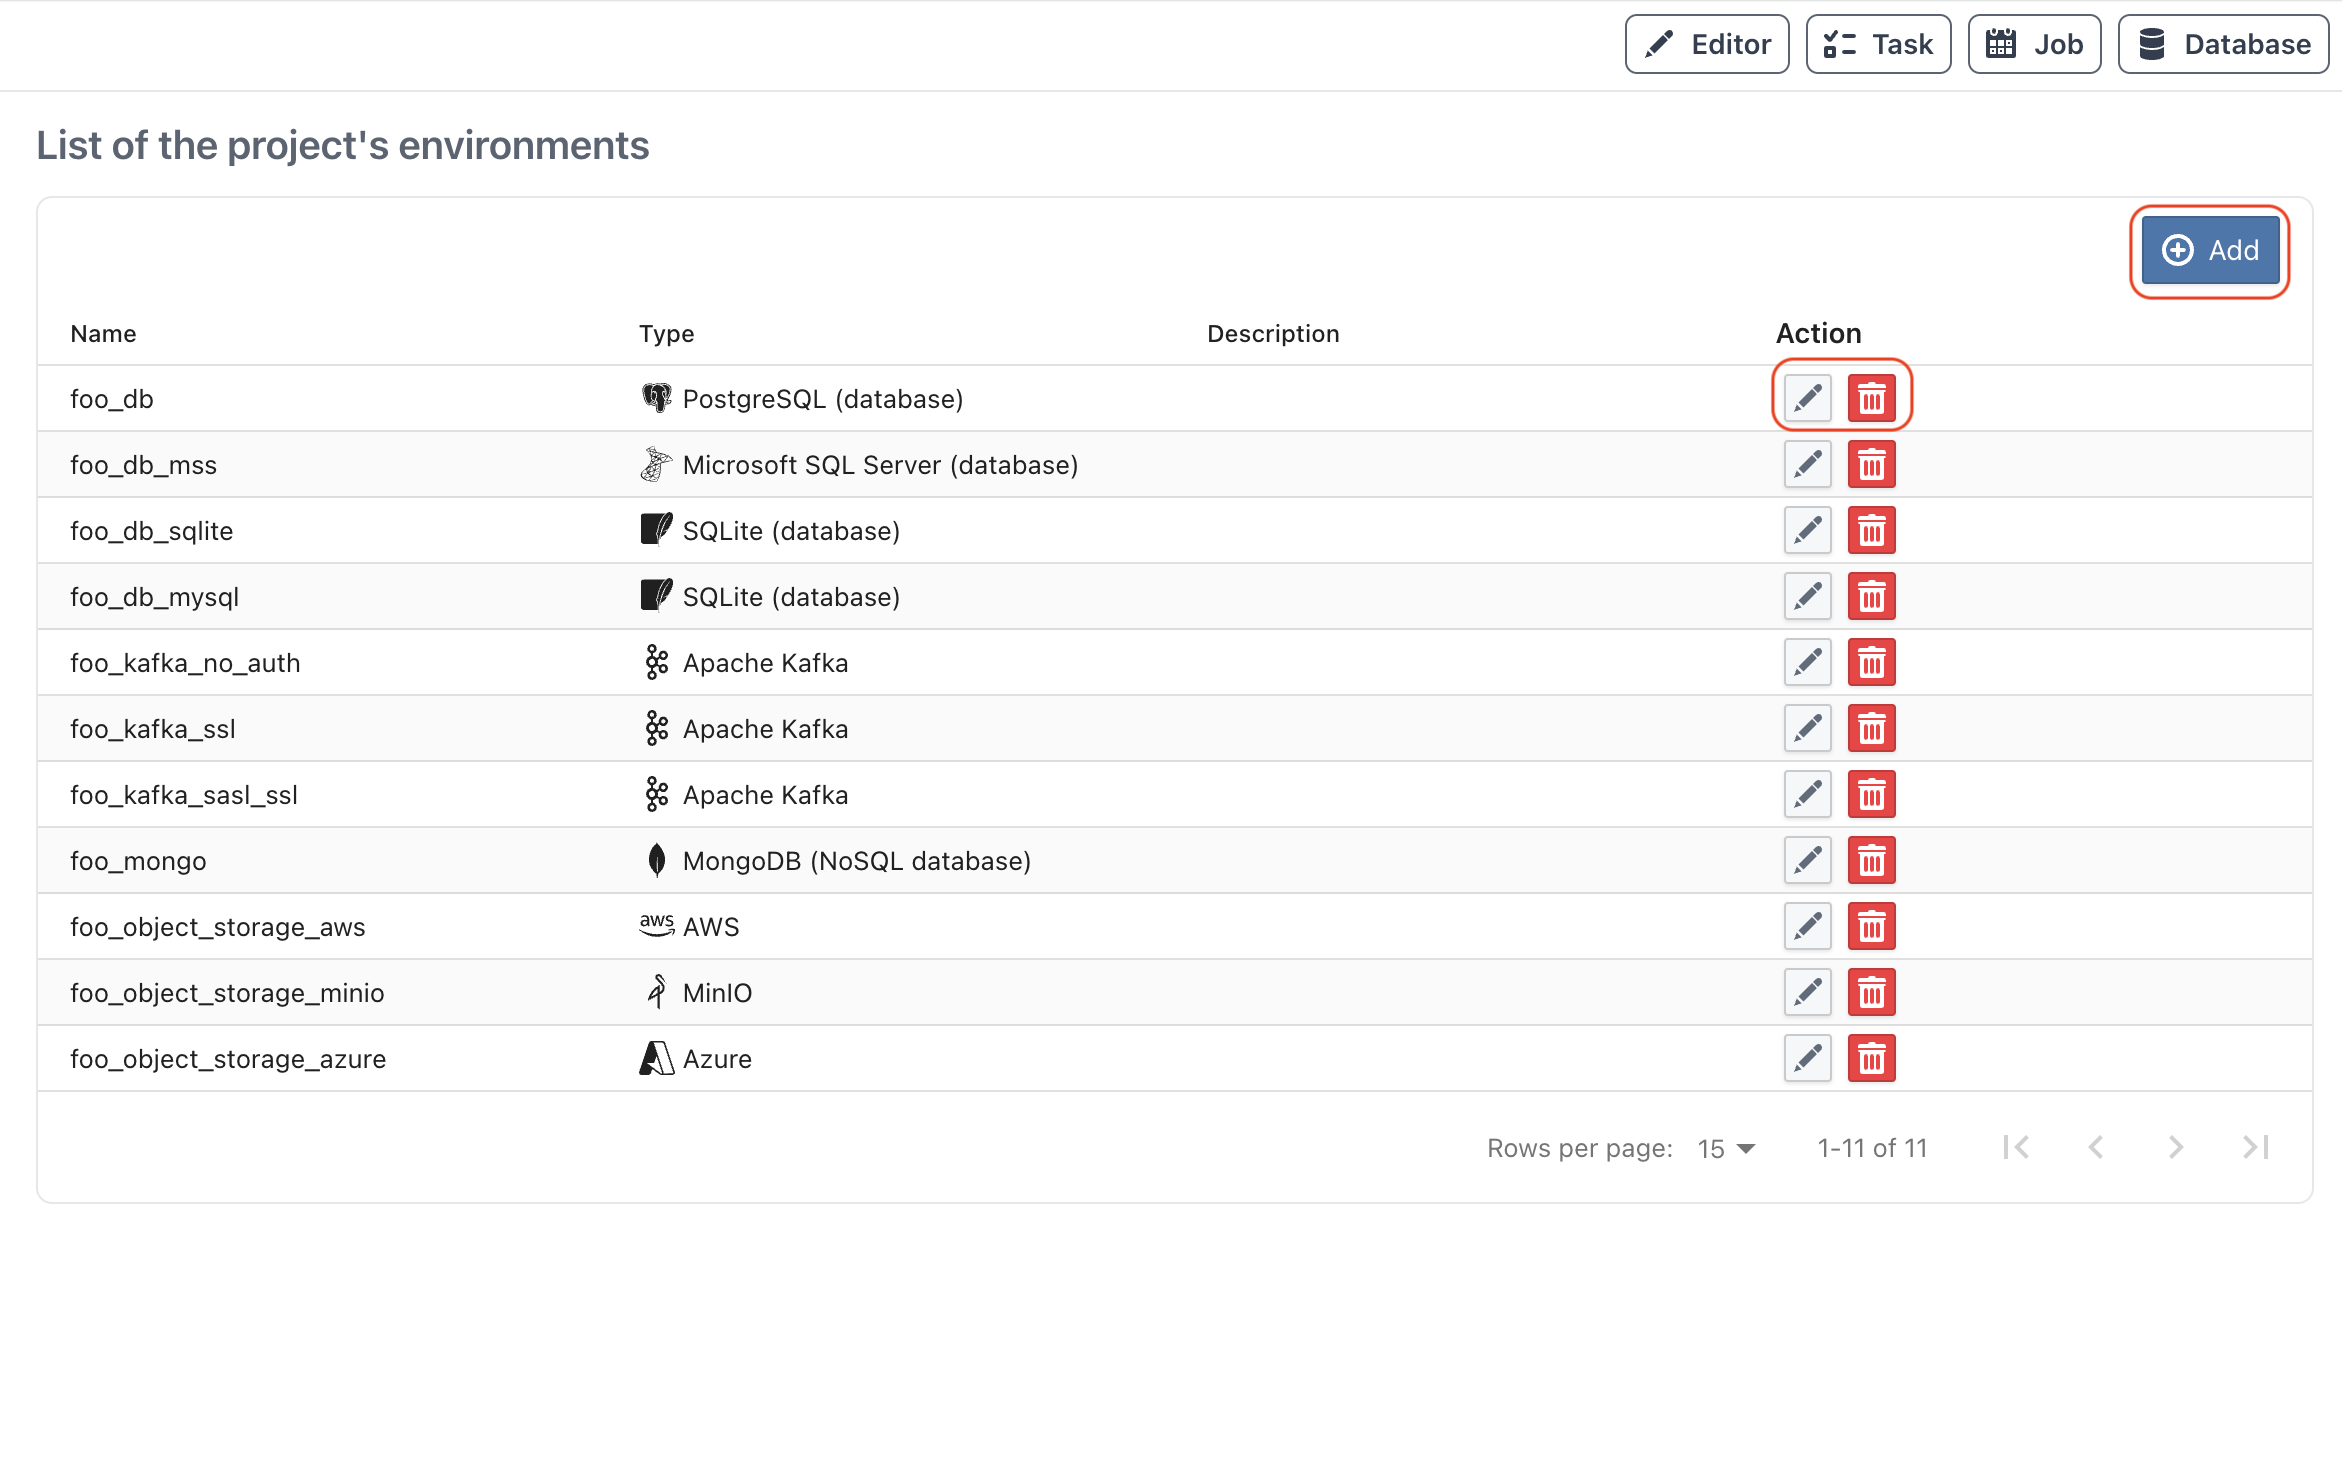
Available Actions
- Add: Add a new environment.
- Edit: Modify the settings of an existing environment. Top-level icon button in the table row.
- More actions (⋯): Opens a popover with:
- Refresh metadata snapshot: For database environments (except SQLite), scan the connection to create or refresh database metadata.
- Reset metadata snapshot: Remove stored metadata for the selected database environment.
- Delete environment: Remove an environment.
Danger
Deleting an environment is a permanent action and cannot be undone.
Refresh metadata snapshot (Database Only)
Use Refresh metadata snapshot from the ⋯ More actions popover in the table row to create or refresh database metadata for the selected environment. This action is available only for database environments that are not SQLite and prompts for confirmation before starting.
Scan behavior:
- The scan reflects all schemas in the selected database that are accessible for the configured user.
- The environment's configured schema remains the default schema for unqualified names.
- You can scope scans by adding a Custom Attribute
include_tables(comma-separated table names, for examplepublic.users,public.orders). - Schemas without access permissions are skipped and logged as warnings in the task timeline.
Reset metadata snapshot (Database Only)
Use Reset metadata snapshot to clear stale or inconsistent metadata before running a fresh scan.
Recommended sequence after schema changes:
- Reset metadata snapshot
- Refresh metadata snapshot
Adding an Environment
To add a new environment, click the Add button on the top right of the Environments pane.
Wizard Steps for Adding an Environment
The wizard has one fixed first step and one fixed last step. The steps in between depend on the environment type you pick — most types get a Settings step and an Options (or TLS & Security) step, plus an optional Advanced / Custom step:
| Type | Settings step | Options / Security step | Advanced / Custom step |
|---|---|---|---|
| RDBMS | DB Settings | DB Options | Yes |
| MongoDB | MONGO Settings | MONGO Options | Yes |
| Kafka | KAFKA Settings | TLS & Security (conditional, see below) | Yes |
| Object Storage | Object Storage Settings | — | Yes |
| Broker (RabbitMQ) | Broker Connection (settings, credentials, and TLS combined into one step) | — | No |
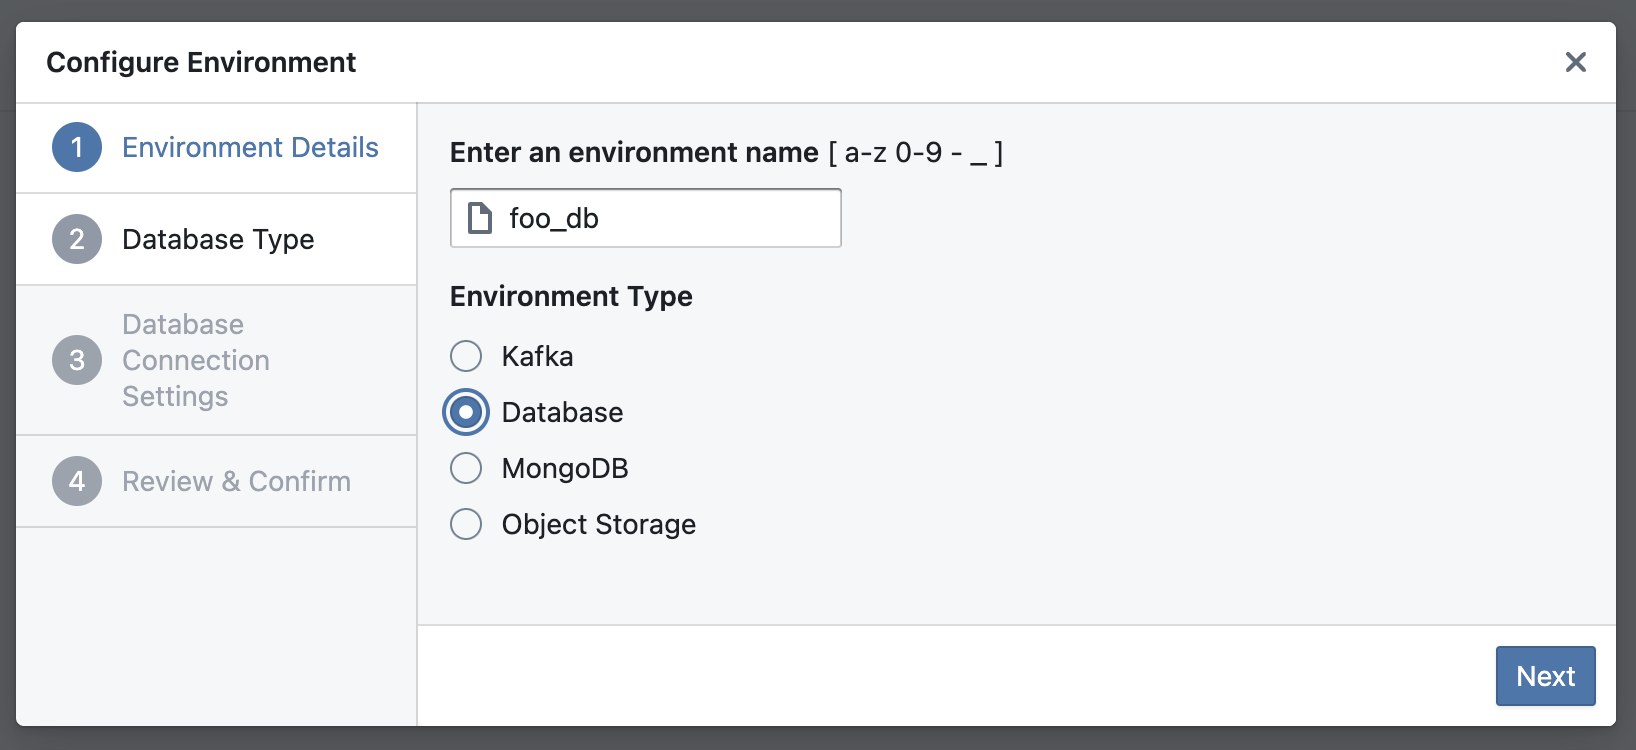
Step 1: Environment Details
Provide a name for your environment and select one of the environment types.
Type-Specific Steps
The Settings/Options (or Connection) steps depend on the selected environment type, per the table above.
Test Connection behavior
The Test Connection action now validates the saved environment configuration through the same runtime materialization path used during execution. In practice, this means descriptor-local environment properties and TLS materials are handled more consistently between setup-time checks and real runs. The environment configuration remains saved even if the test itself fails, so you can correct and retry without re-entering everything.
DB Settings / DB Options (RDBMS)
Configure your database settings. For example, if you select PostgreSQL, you will need to provide details like Host, Port, Database name, Schema, User, and Password.
For Kafka-specific TLS/SASL connection guidance, see Kafka TLS & Security.
Oracle-specific notes:
- Oracle connections support both service name and SID targets.
- Provide only one of the two. Precedence when both are set is not currently consistent across the platform (DAT-1583) — do not rely on either target being silently ignored.
- Legacy Oracle setups that only provide
databaseare still treated as service-name style target resolution.
Kafka TLS & Security (Simplified Flow)
When you configure a Kafka environment with SSL or SASL_SSL, the wizard now adds a dedicated TLS & Security step.
If you use PLAINTEXT, this step is hidden so the flow stays focused.
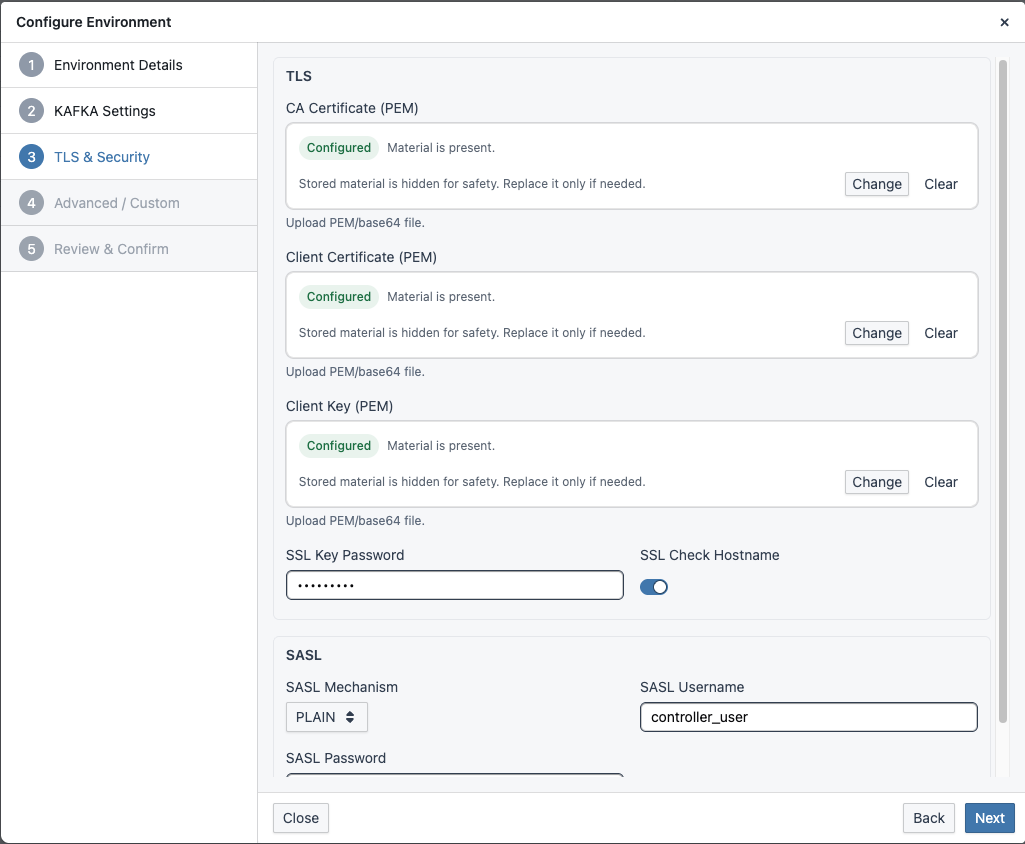
Why this flow is simpler:
- No empty security step: TLS/SASL sections appear only when required by the selected security protocol.
- Upload-first UX: Drag-and-drop is the primary input for PEM/key files, and staged changes are applied explicitly.
- Reduced certificate friction:
CA Certificate,Client Certificate, andClient Keyare grouped in one TLS step; provide client cert/key when broker requires mTLS. - Consistent storage/runtime behavior: Uploaded binary materials are converted and persisted in a runtime-safe format for health checks and task execution.
Broker Connection (RabbitMQ)
Provide Host, Port, User, and optionally Virtual Host and Password. Switch on Enable TLS to reveal the CA Certificate, Client Certificate, and Client Key inputs; they accept PEM material and follow the same chain and mTLS rules as the Kafka TLS step above. Broker options also include Heartbeat, Blocked Connection Timeout, Connection Attempts, and Retry Delay. A Broker environment can be used as a source and as a target in the DSL. Unlike the other types, Broker has no separate Advanced/Custom step — everything is on this one step.
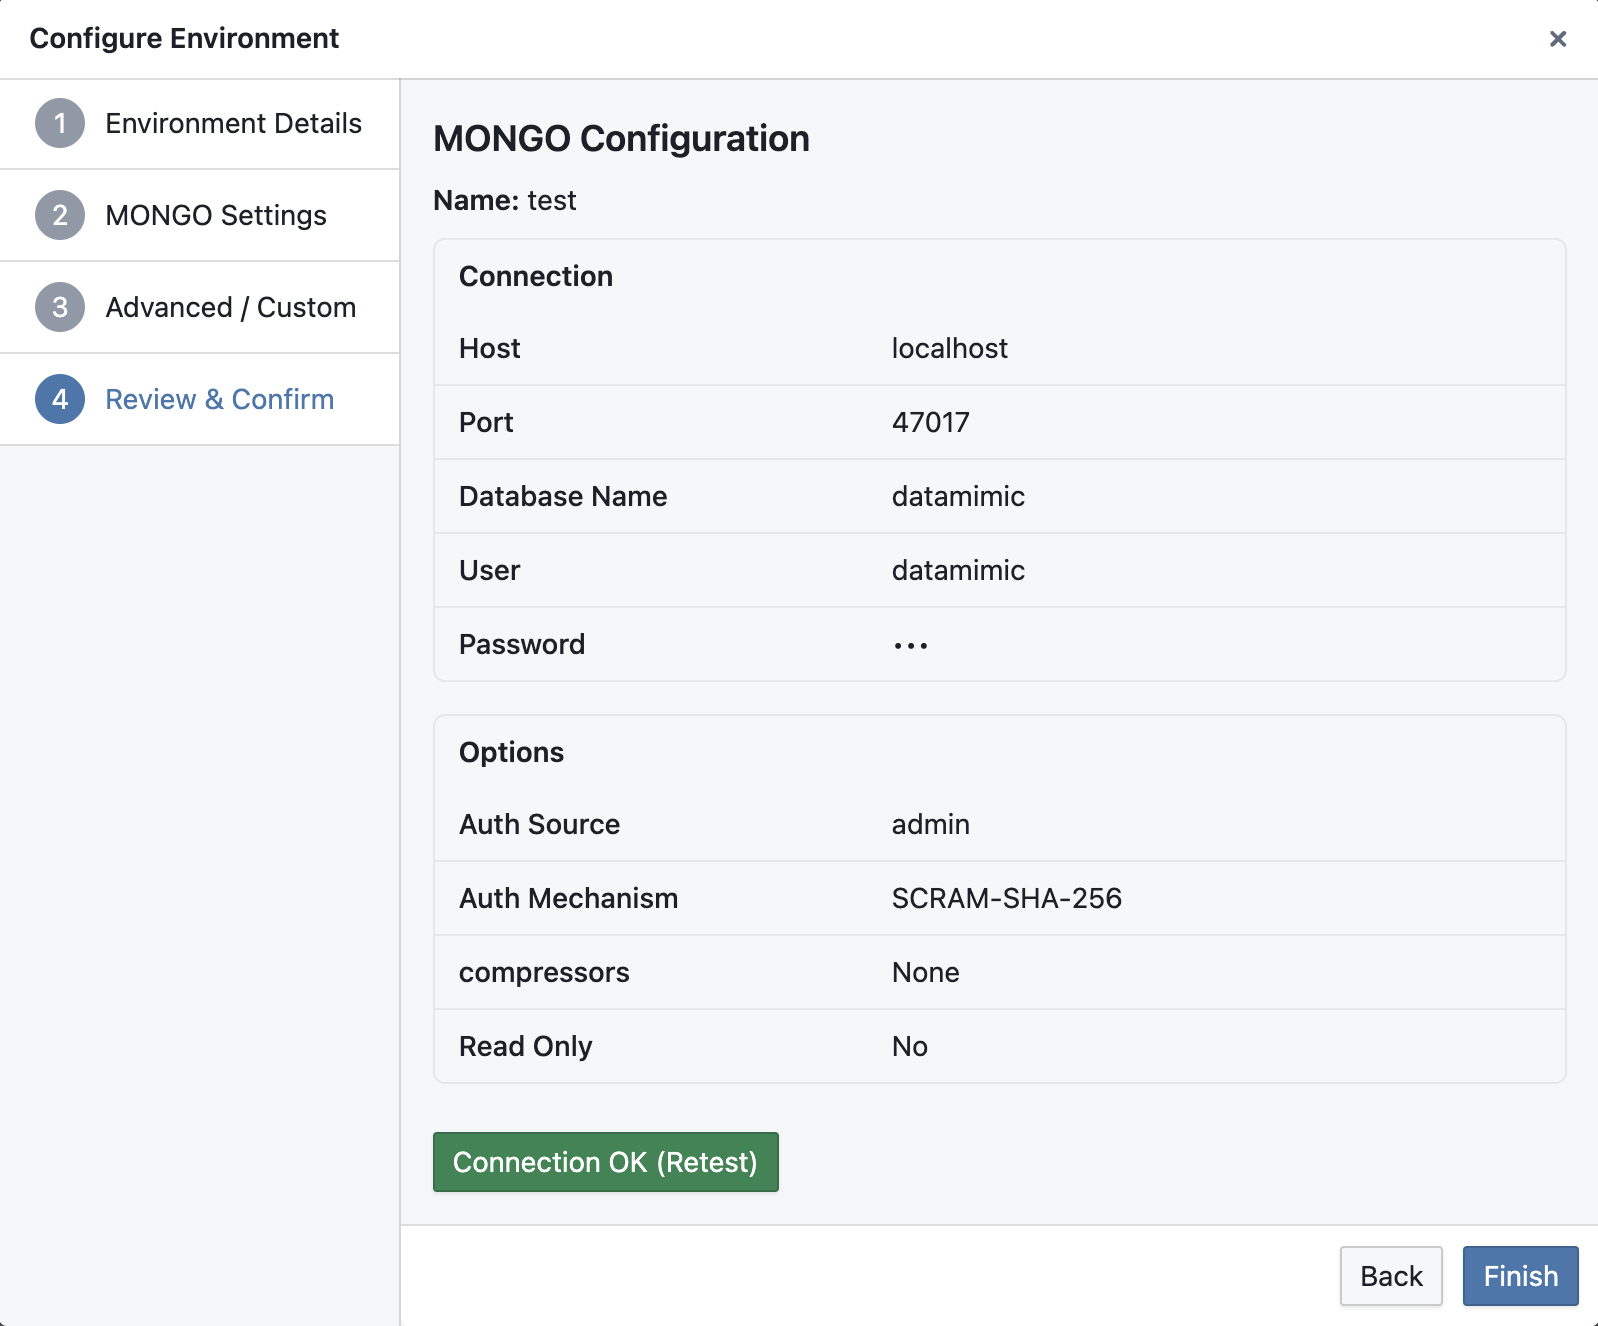
MONGO Settings / MONGO Options (MongoDB)
Provide Host and Database Name, and optionally Port, User, and Password. Under Options, you can set Auth Source, Auth Mechanism (PLAIN, SCRAM-SHA-1, SCRAM-SHA-256, MONGODB-CR, MONGODB-X509, GSSAPI), Compressors (comma-separated, allowed: snappy, zlib, zstd), TLS, and Read Only.
Object Storage Settings
Select a Type (aws, minio, or azure) and provide Host. Optionally provide Port, Access Key, Secret Key, enable Use TLS/SSL, and provide a Connection String (for Azure or custom endpoints).
Final Step: Review & Confirm
Review your settings and confirm the creation of the new environment.
Tip
You cannot find your database system? Get in touch with our team to enable this type for your account or instance.
Kafka Security Reference (Enterprise Quick Guide)
Kafka Security Modes
| Protocol | Transport encryption | Authentication | Typical certificate requirement |
|---|---|---|---|
PLAINTEXT |
No | None | No TLS material |
SSL |
Yes | TLS certificate-based | CA material may be needed, client cert/key only for mTLS |
SASL_SSL |
Yes | SASL user/password over TLS | CA material may be needed, client cert/key only if broker enforces mTLS |
What Each TLS Field Means
- CA Certificate: trust anchor(s) used by the client to verify broker certificates. Whether it is needed depends on the broker certificate trust configuration.
- Client Certificate: public certificate chain presented by the client when broker requires client authentication (mTLS).
- Client Key: private key matching the client certificate.
- Client Key Password: only needed when the private key is encrypted.
Certificate Chain Rules
- Use PEM format for all TLS materials.
- Client Certificate file should contain:
- leaf/client certificate first
- intermediate CA certificates after that
- do not include the private key in this file
- CA Certificate file should contain trusted CA certs (root and, if needed, intermediates).
Include intermediates when your broker chain is incomplete or enterprise trust policy requires explicit bundles.
mTLS Decision Logic
- If broker-side
ssl.client.auth=required, client must provide valid Client Certificate + Client Key. - If broker-side client auth is not required, you can connect with
CA Certificateonly (plus SASL credentials forSASL_SSL). - If
Client Keyis set withoutClient Certificate, client-certificate auth cannot work; configure both together.
Recommended Validation Sequence
- Verify protocol and auth mode with platform/network team (
SSLvsSASL_SSL, mTLS required or not). - Validate broker certificate trust path using your CA bundle.
- If mTLS is required, validate client cert/key pair and key password together before rollout.
- Run a negative test:
- expected mTLS: connection without client cert should fail.
- expected non-mTLS: connection should still succeed with CA + protocol credentials.
- Confirm behavior against effective runtime broker config (not only repository defaults).
Common Misconfiguration Patterns
- Wrong key password appears to have no effect: usually means client key was not used (for example missing client certificate).
- Handshake failures on enterprise clusters: often caused by incomplete CA chain or wrong cert/key pairing.
- Intermittent environment differences: broker-side effective config differs between test/prod clusters.