Backup and Restore DATAMIMIC Data
This guide explains how to backup and restore data in your DATAMIMIC instance, helping you safeguard your configuration and generated data.
Danger
The backup and restore process is critical—handle with extreme care. Any misstep could lead to irreversible data loss, so please verify each step.
Note
Before backup or restore operation, the administrator should create a banner to notify all users about the maintenance due to the instance will be locked down during the operation.
Overview
DATAMIMIC provides backup and restore for the following data components of an instance:
- PostgreSQL database (tables, relationships, configurations)
- Selected MinIO buckets, when object-storage backup is enabled (user data/projects, snapshots, and logs)
Creating a Backup
Prerequisites
- You must have administrator privileges to access the backup functionality
- Ensure you have enough disk space for the backup file
Steps to Create a Backup
- Navigate to Admin Settings → Backup and Restore
- Click the Create Backup button to open the Create System Backup dialog
- On the Configure step, optionally set a cron expression to schedule a recurring backup instead of running one immediately, then click Review
- On the Review & confirm step, check the backup plan (schedule, scope, and options), then click Create Backup (or Schedule Backup if a cron expression was set)
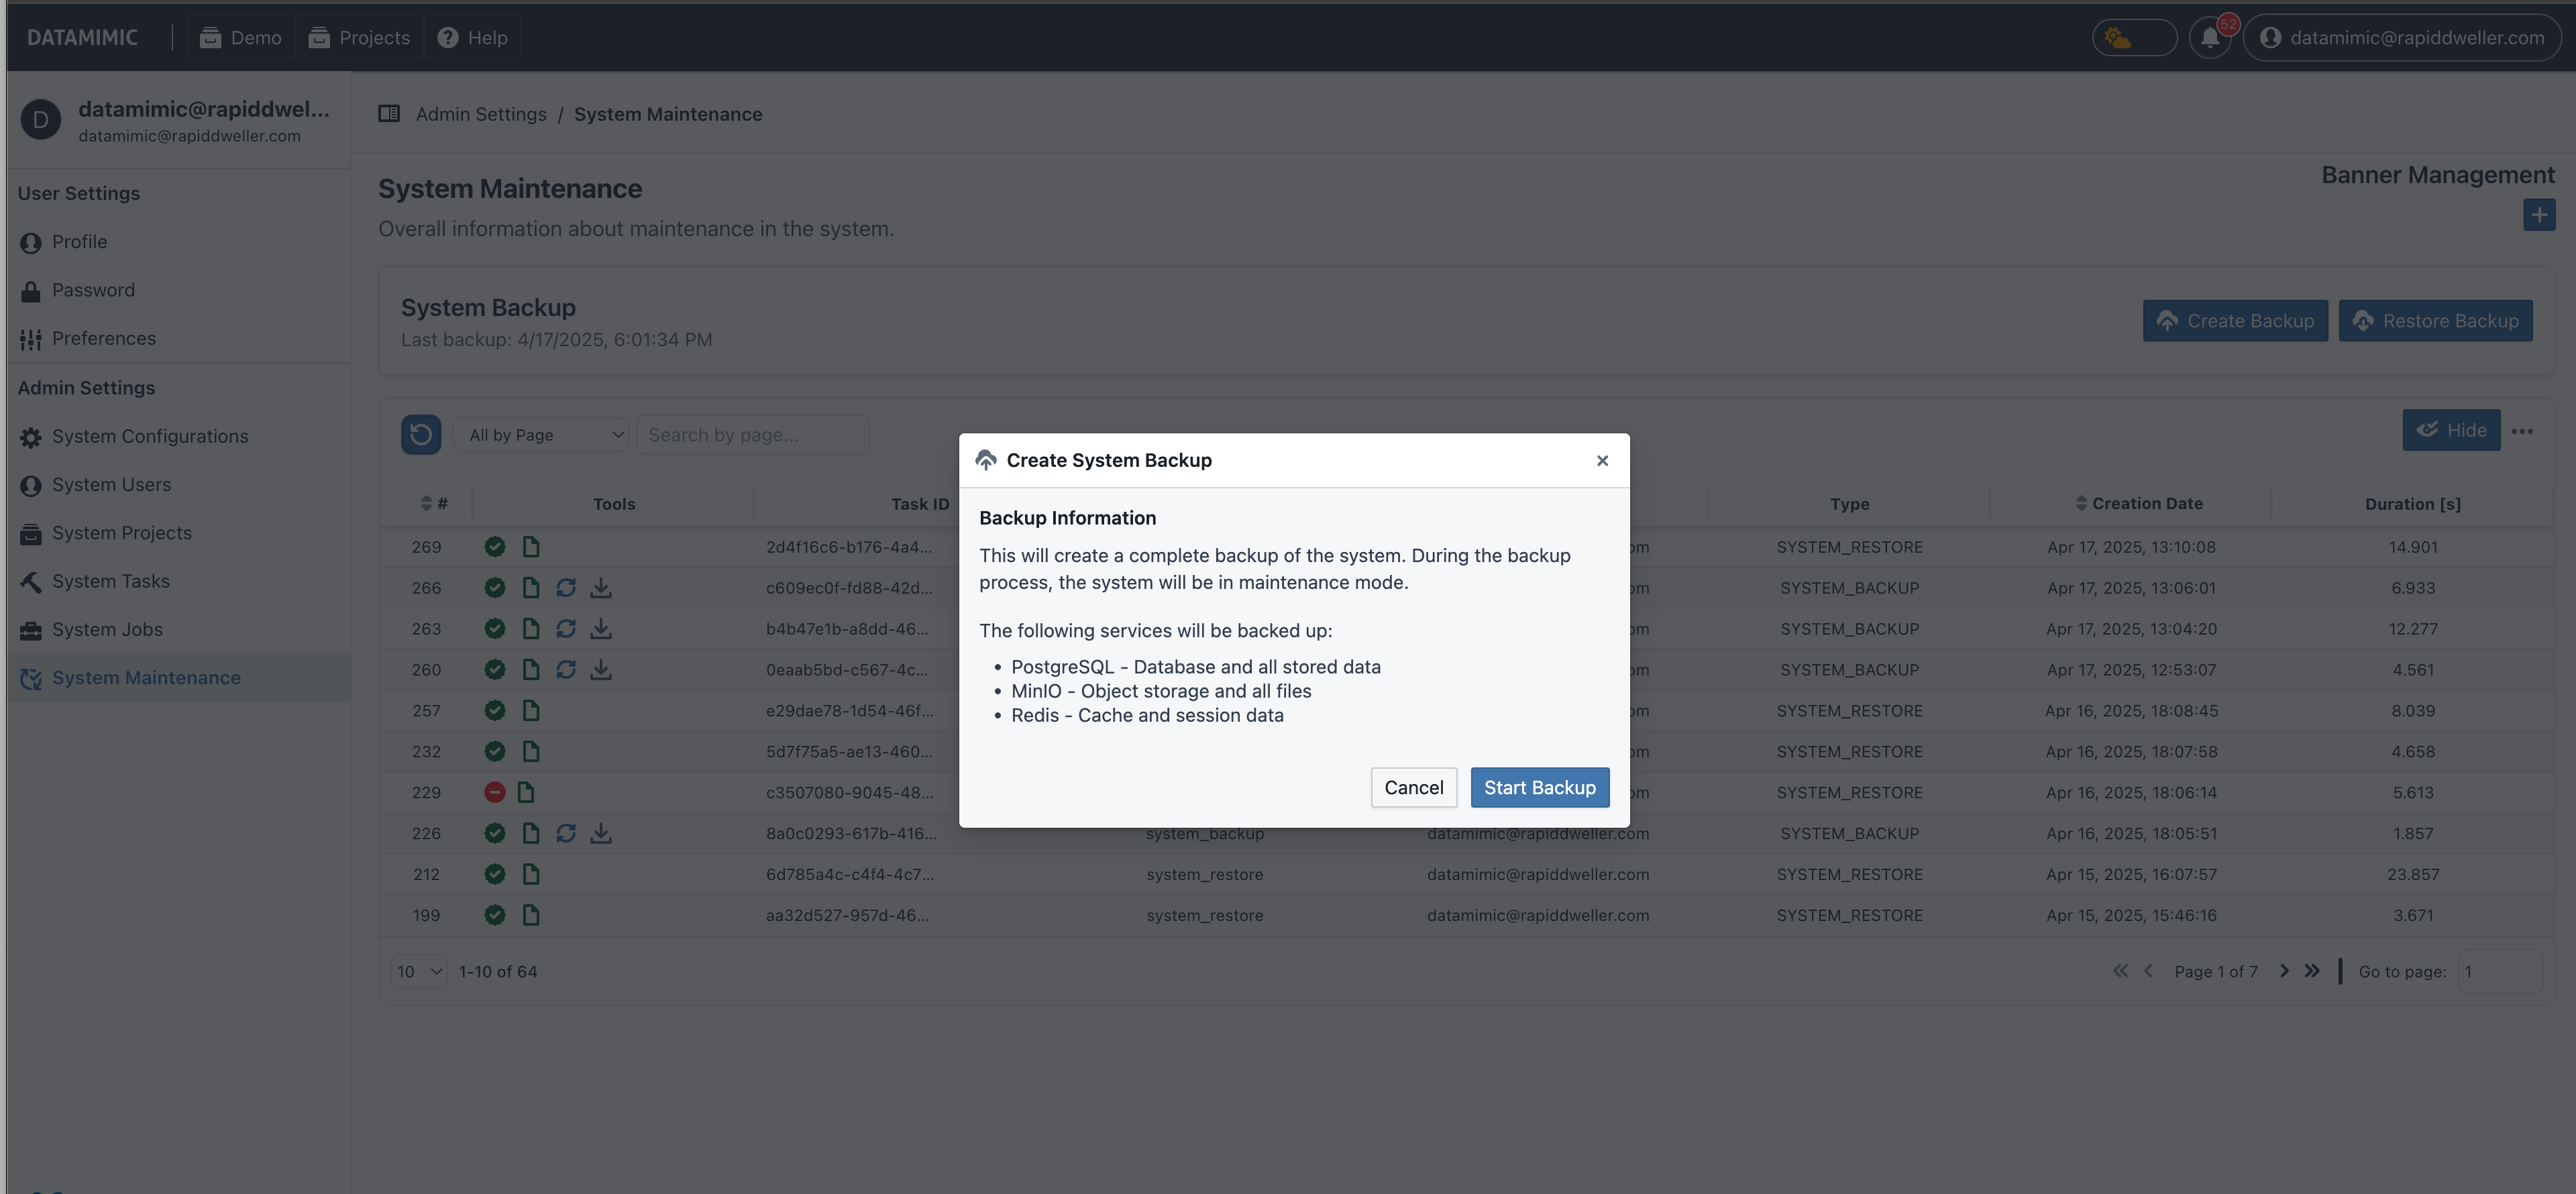
What Happens During Backup
When a backup operation is initiated:
- In production, DATAMIMIC enters Maintenance Mode
- Only administrator users can log in during this period
- Other users are redirected to a maintenance page with a message
- The system takes snapshots of:
- PostgreSQL database (excluding system-related tasks)
- Selected MinIO buckets, when configured (excluding artifact buckets)
- The backup data is compressed into a single
.tar.gzfile - Once complete, the system exits Maintenance Mode
Accessing Backup Files
Completed backups are stored as task artifacts. To download a backup:
- Navigate to the task list and find your backup task
- Download the artifact from the task details page
For more information on accessing task artifacts, see the Task Artifacts documentation.
Details of Backup Files
The DATAMIMIC backup process creates a .tar.gz file that bundles all relevant data. When extracted, you'll find a backup_info.toml file containing metadata about the backup. This metadata primarily provides administrators with key information such as the timestamp, backup ID, and the DATAMIMIC version (both platform and core) at the time of the backup, as well as details about the underlying data stores (e.g., PostgreSQL version, MinIO bucket list).
Since the archive also contains the actual backup data, it is recommended that you store this file securely.
Restoring from a Backup
Danger
Restoring from a backup will overwrite your current DATAMIMIC data. This operation cannot be undone. Make sure to create a backup of your current data before proceeding if needed.
Restore Methods
DATAMIMIC offers two entry points to restore your instance:
Method 1: Restore from an Existing Backup Task
If the backup was created in your current instance:
- Navigate to Admin Settings → Backup and Restore
- Find the backup task in the task list below and click its Restore (refresh) icon — only enabled for completed backups with a downloadable artifact
- Review the warning and the Backup ID shown in the Restore Backup dialog, then click Restore to confirm
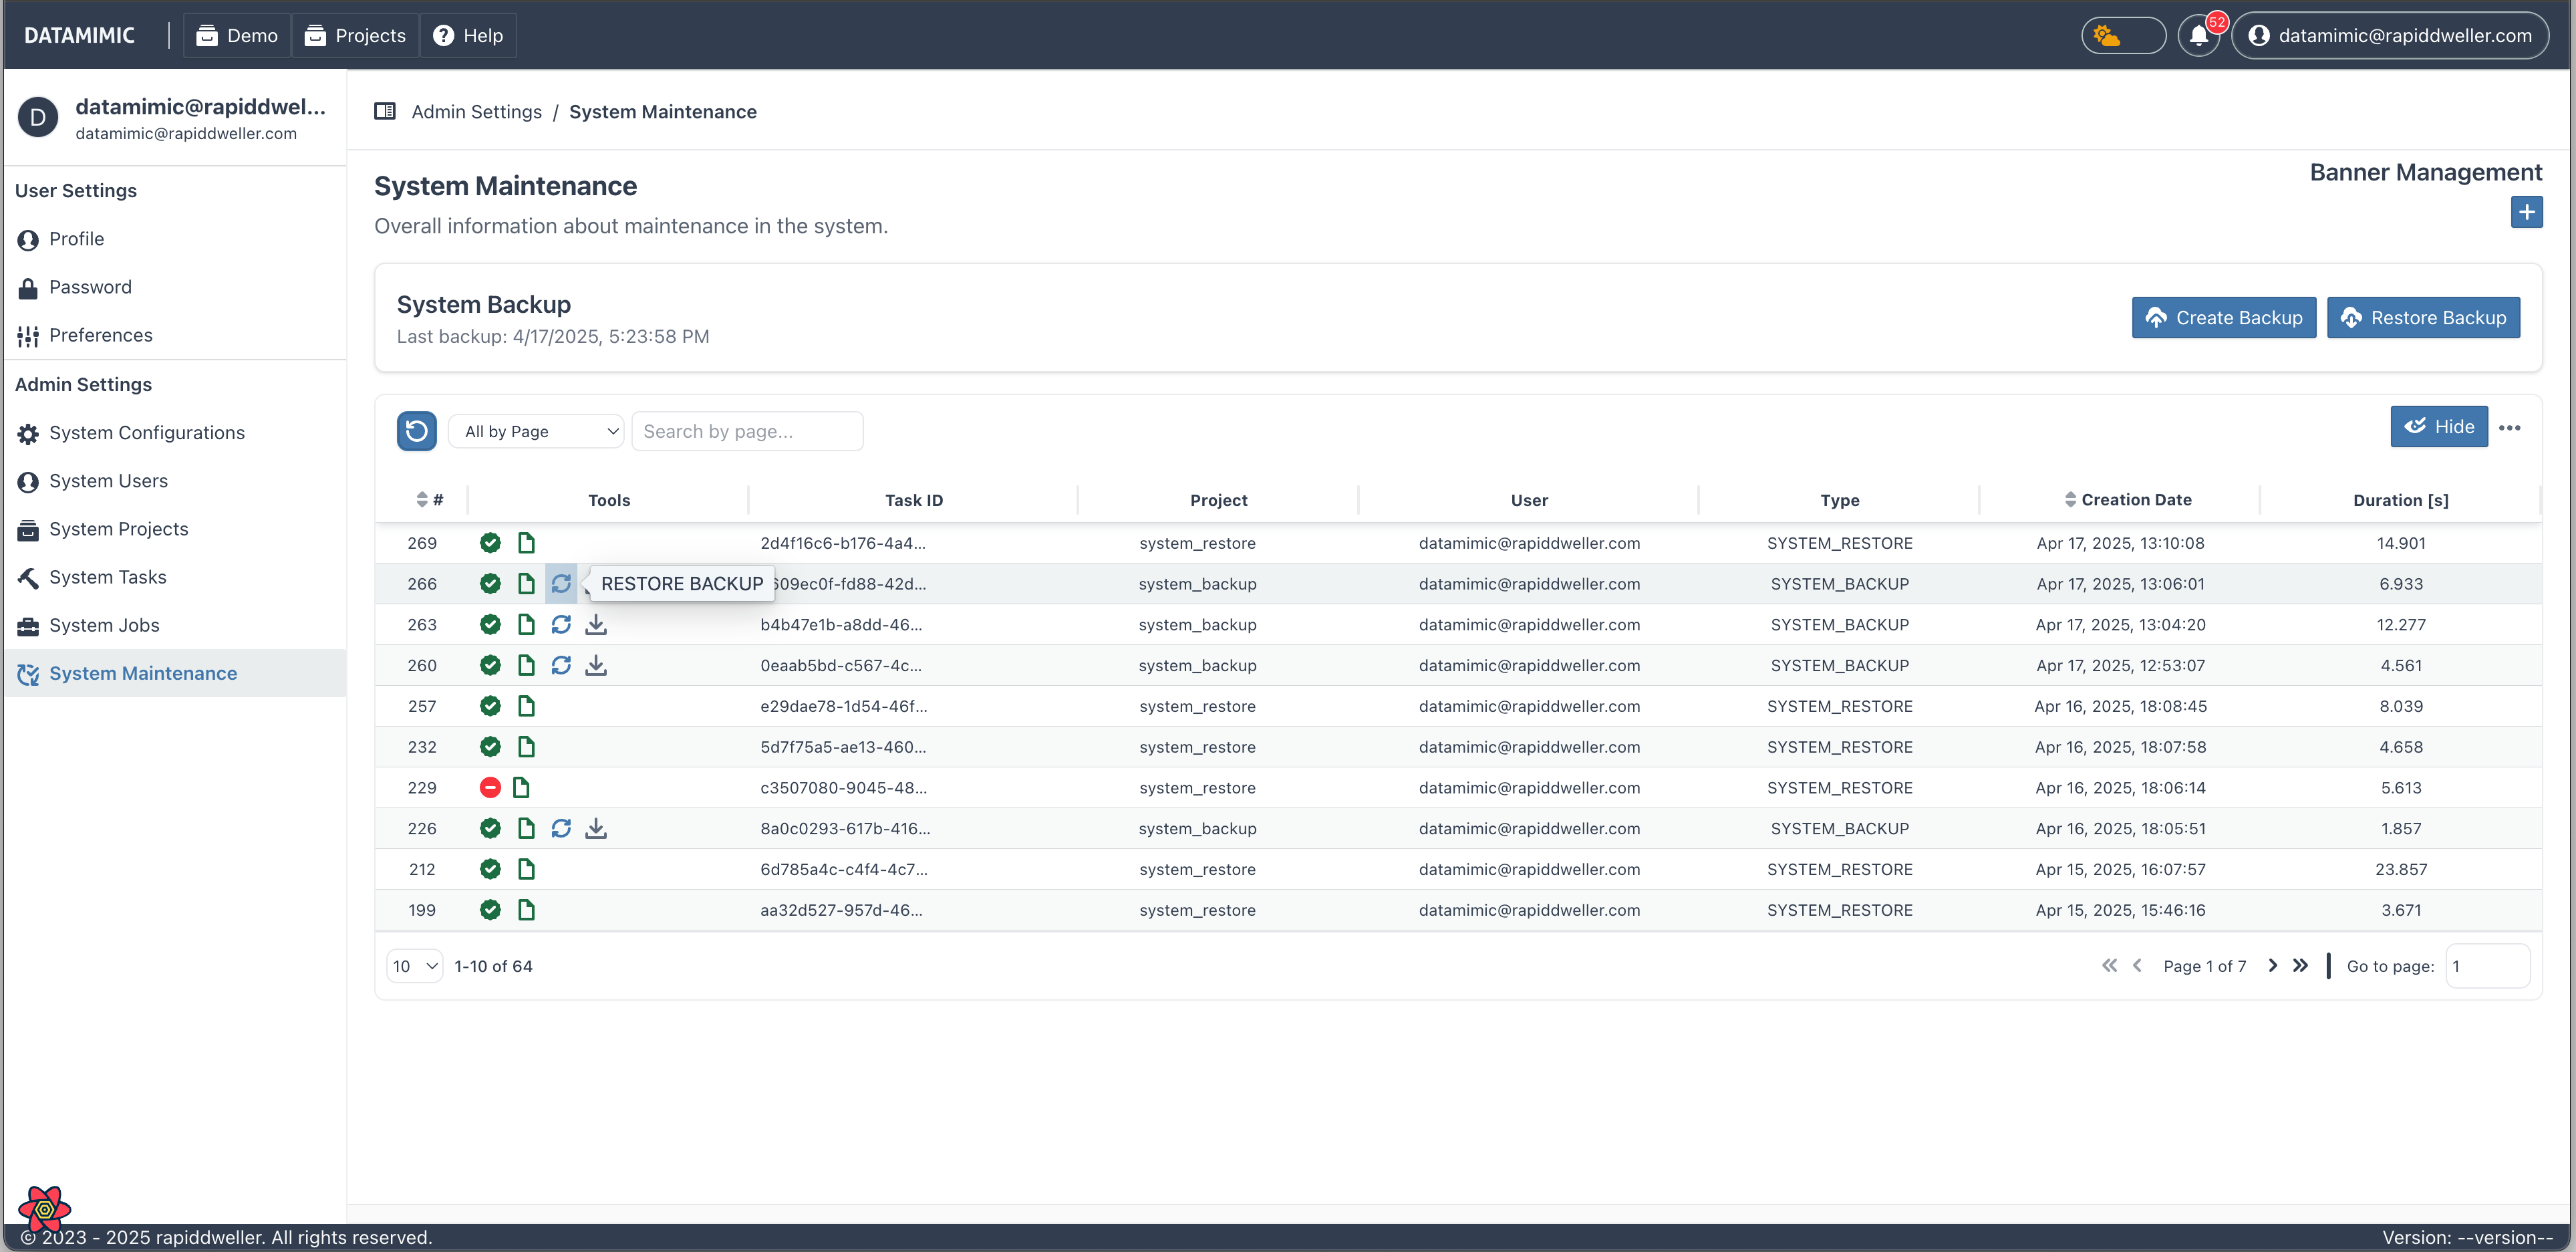
Method 2: Upload a Backup File or Enter a Backup ID
Click Restore Backup on the Backup and Restore page to open the Restore from Backup (Upload File / Backup ID) dialog. It walks through three steps — Restore Information, then either of the following on the Restore from Backup step, and finally Confirm Restore.
Pre-restore options
The Restore Information step also offers two off-by-default, destructive toggles: Reset MinIO buckets before restore (clears the selected buckets first) and Reset data tables before restore (truncates project-related tables and the worker task table; auth tables are untouched). Use them only when you deliberately want a clean slate before applying the archive.
Upload a Backup File
If you have a backup file from another instance or previously downloaded, use the Upload Backup File tab and select your backup file (.tar.gz or .zip, as accepted by the restore API).
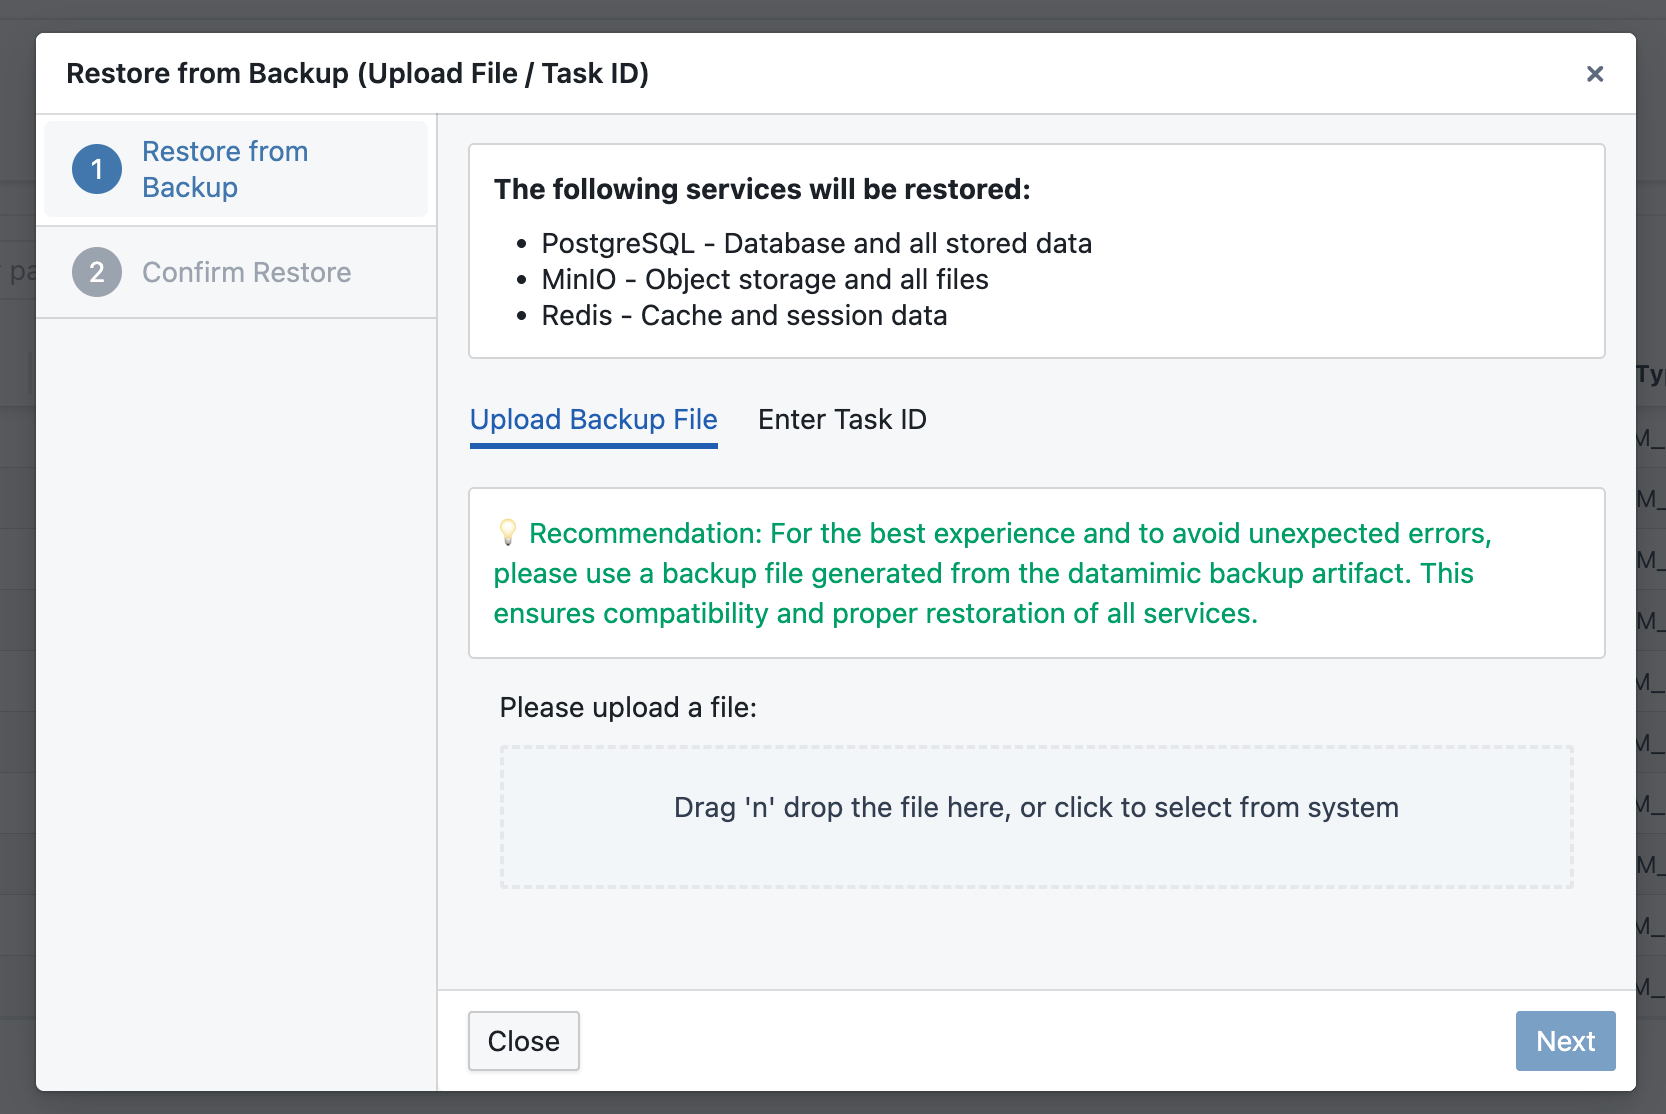
Restore from a Backup ID Uploaded Directly to MinIO
If you have access to DATAMIMIC's instance MinIO, you can upload the backup file directly into MinIO either through the MinIO UI or CLI, then reference it by ID from the Enter Backup ID tab instead of re-uploading it through the dialog.
- Upload the backup
.tar.gzfile directly to MinIO:- Use the MinIO UI or MinIO CLI tool to upload the
.tar.gzbackup file directly to MinIO. - The backup needs to be inside the "backup" bucket and inside a top-level directory object
- Use the MinIO UI or MinIO CLI tool to upload the
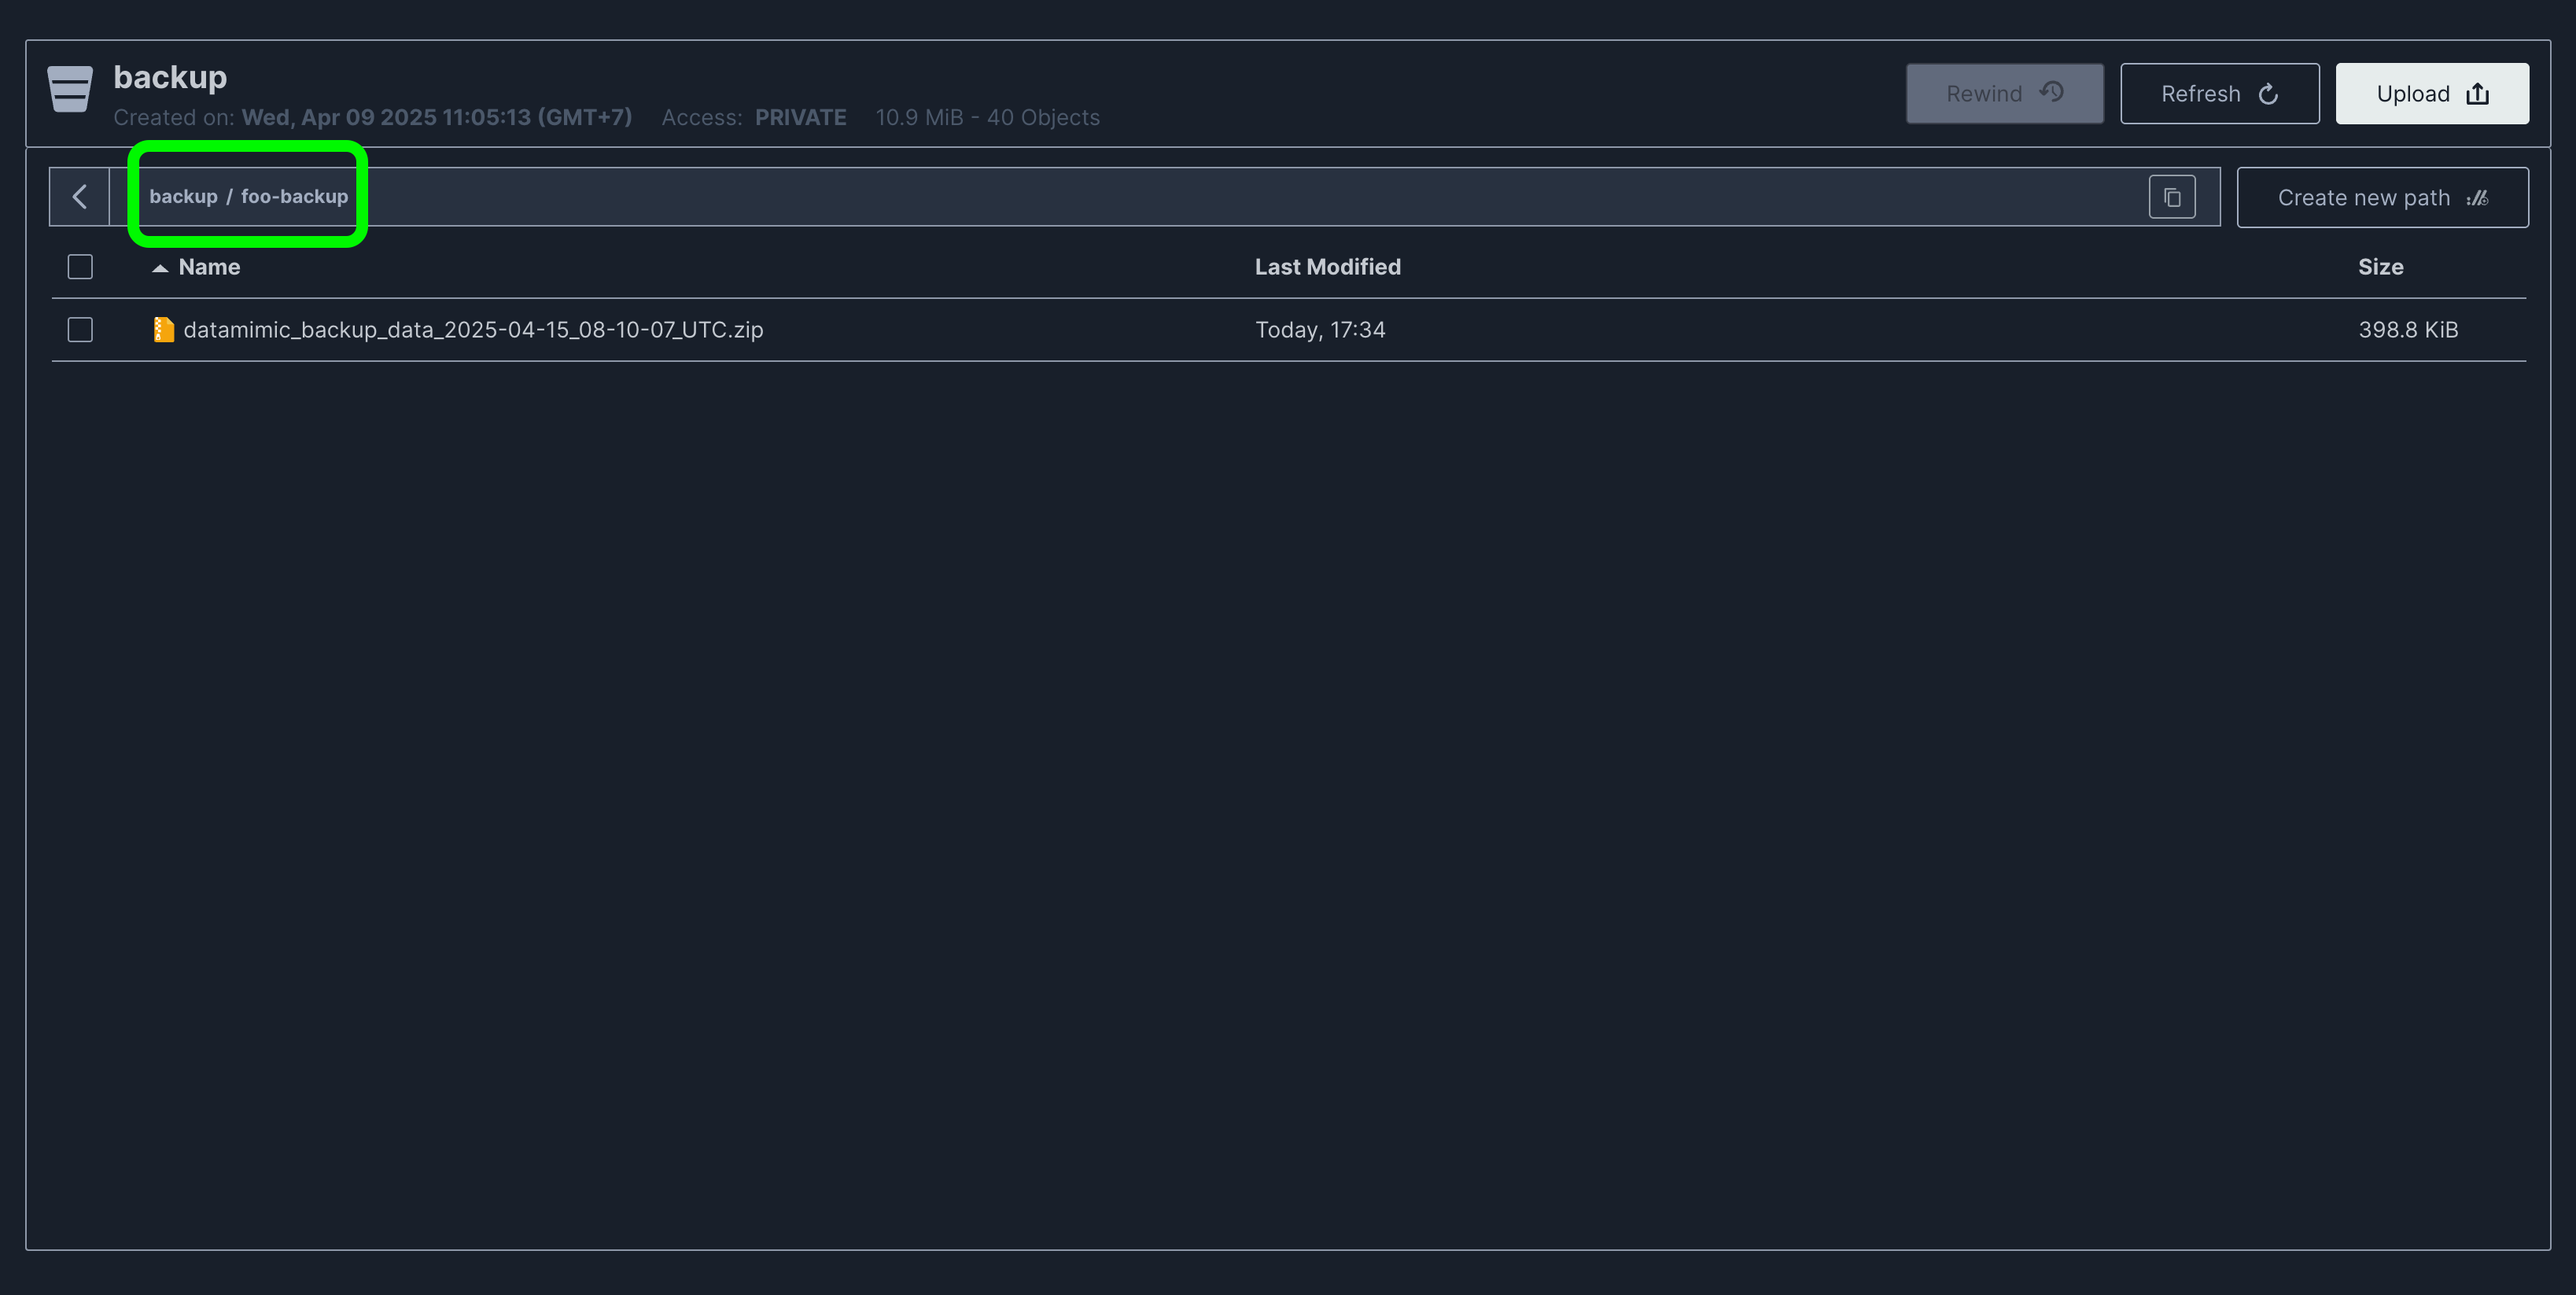
- As you can see from the example image, our backup file is inside a `foo-backup` directory which is inside the "backup" bucket. This `foo-backup` will be used as the backup ID in the next step.
- Click Restore Backup, advance to the Restore from Backup step, switch to the Enter Backup ID tab, and enter the backup ID from step 1 (in this example,
foo-backup) - Review the warning on the Confirm Restore step, then click Restore to confirm
What Happens During Restore
When a restore operation is initiated:
- In production, DATAMIMIC enters Maintenance Mode
- Only administrator users can log in during this period
- Other users are redirected to a maintenance page with a message
- Current data is cleared from:
- PostgreSQL database
- The specified MinIO buckets, when object-storage restore is configured
- Data from the backup is restored to each system
- Once complete, the system exits Maintenance Mode
Best Practices
- Create regular backups of your DATAMIMIC instance, especially before major configuration changes
- Store backup files in a secure, external location
- Test restoration procedures in a non-production environment before using in production
- Document the contents and date of each backup file
- Monitor the available disk space for backup operations
Troubleshooting
If you encounter issues during backup or restore:
- Check the task logs for detailed error information
- During a production backup or restore, regular users will not have access to the application. An administrator can still log in and deactivate maintenance mode manually
- Ensure your instance has sufficient disk space
- Verify that all services (PostgreSQL, MinIO) are running properly
- Contact DATAMIMIC support if issues persist
Limitations
- Backup infrastructure tasks are excluded from backups to prevent conflicts during restoration
- If the restore target is a fresh instance (without any data), the new task data will only include tasks related to projects and system scope
- If the restore target is on the same instance (with existing data), the new task data will combine with existing backup infrastructure task data
- Artifact and demo data in MinIO are not included in backups to reduce file size
- Very large databases may require additional time for backup and restore operations