Git Connected Functionality
This article explains how to work with Git-connected projects in DATAMIMIC: how to create a project cloned from a Git repository, how to push generated results back to Git via the Task view, and how to update the project from the remote main branch.
Adding a Git Project
A Git Project clones a remote repository into DATAMIMIC so that your project files are version-controlled.
Step 1 — Open the Project Wizard
In the Project View, click the (+) button to open the Project Wizard.
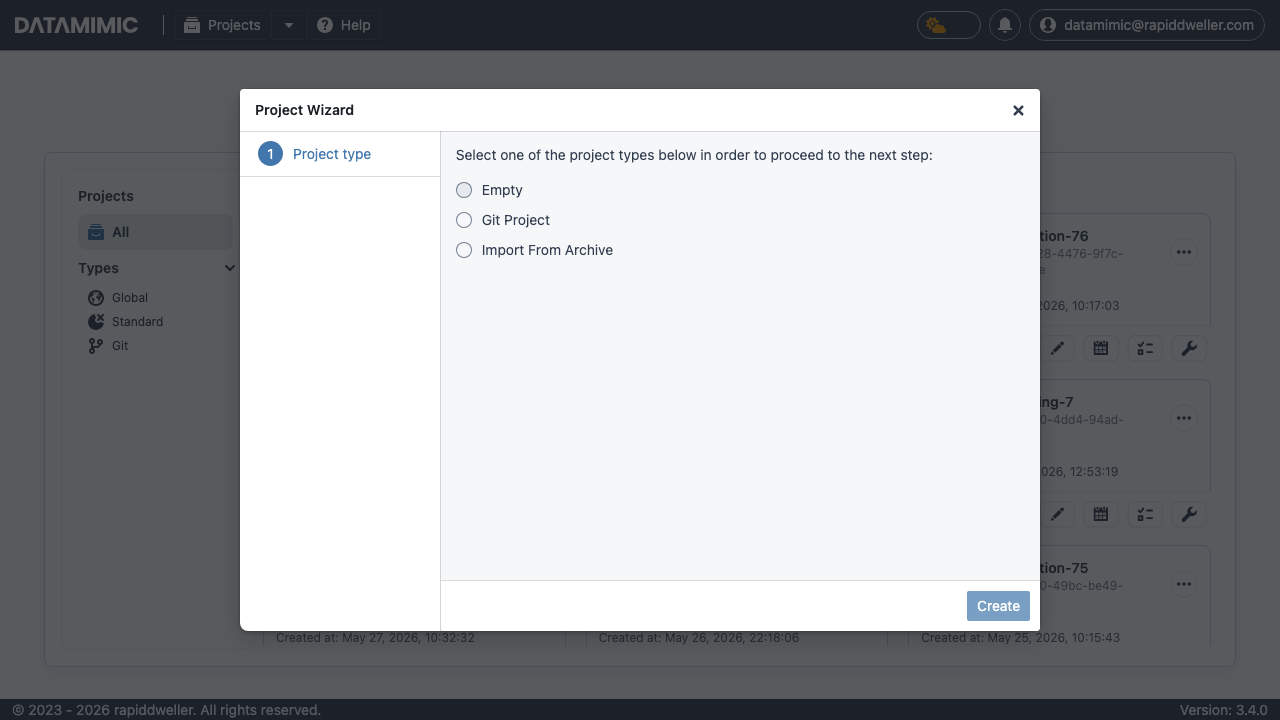
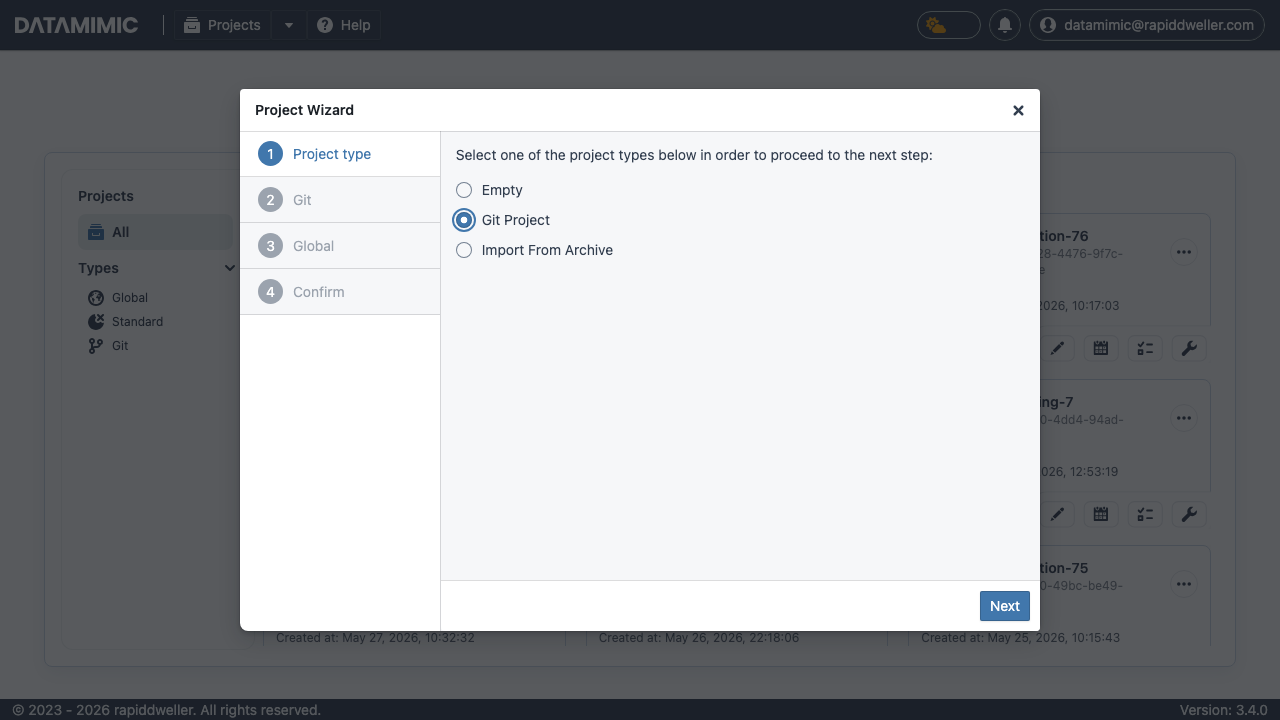
Step 2 — Select "Git Project"
Choose Git Project and click Next.
Step 3 — Configure your Git provider
On the Git step, select your provider (GitLab, GitHub, Bitbucket, or Gitea) and fill in:
- Git URL — the HTTPS clone URL of the repository
- Git Token — a personal access token with the required scopes shown in the info box
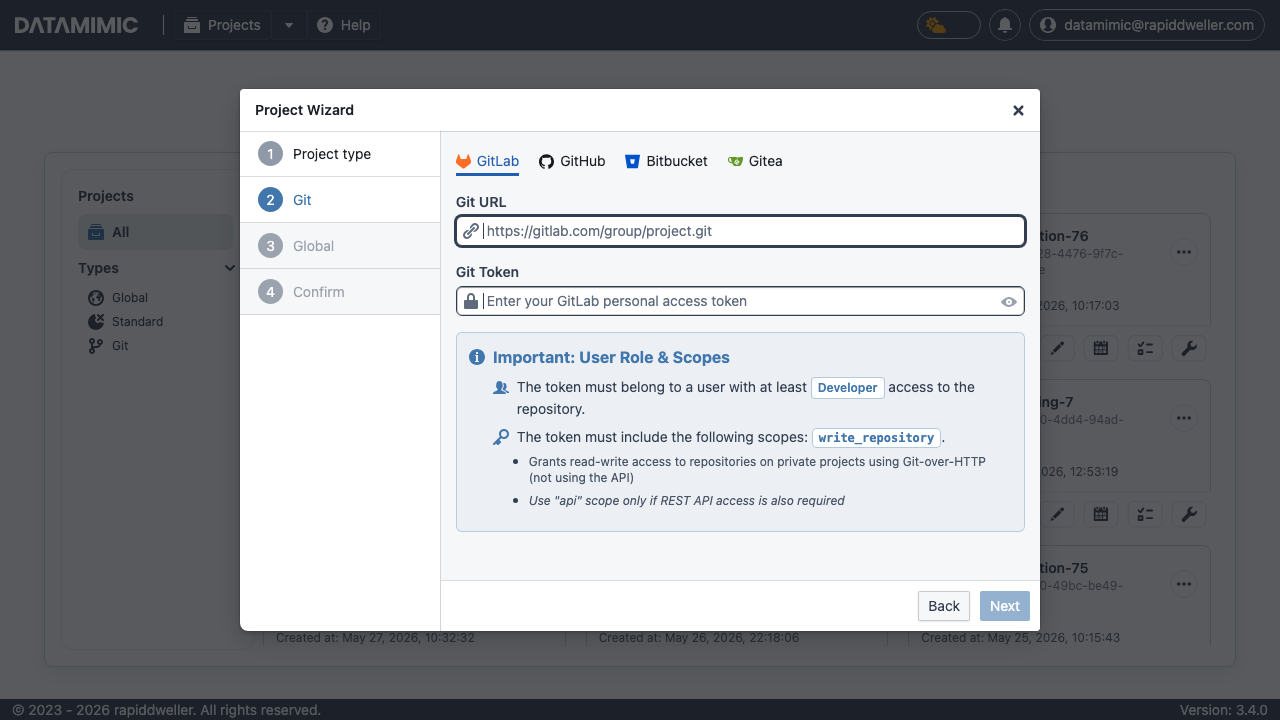
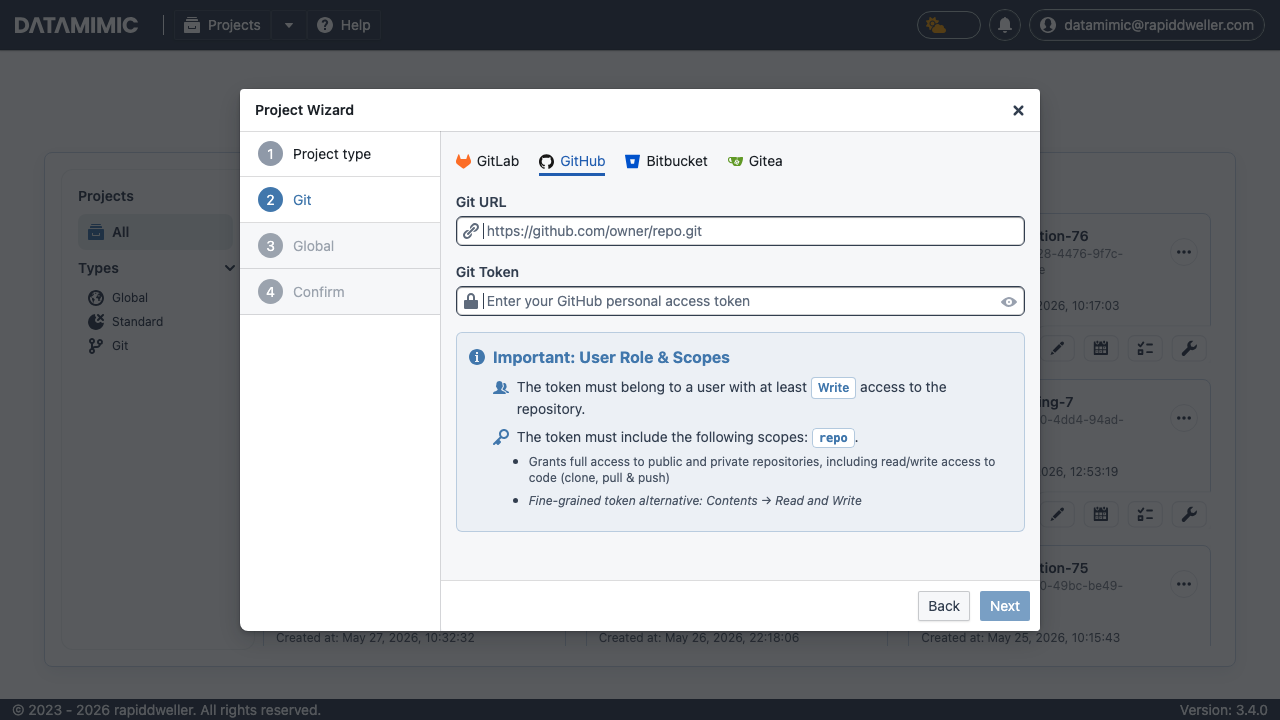
Token Permissions
Each provider tab shows the exact role and scopes your token needs. For GitLab this is the write_repository scope; for GitHub it is the repo scope.
Step 4 — Complete the wizard
Click Next, fill in any remaining steps, and confirm. DATAMIMIC clones the repository and opens the project in the Editor.
Pushing Changes via the Task View
After running a data-generation task, you can push the resulting project state to your Git repository as a new branch. The new branch must then be reviewed and merged in your Git provider (GitLab, GitHub, etc.).
How it works
Navigate to Tasks for a Git-connected project. Each generation task row displays a ![]() Push Project button in the Tools column (rightmost icon in the row).
Push Project button in the Tools column (rightmost icon in the row).
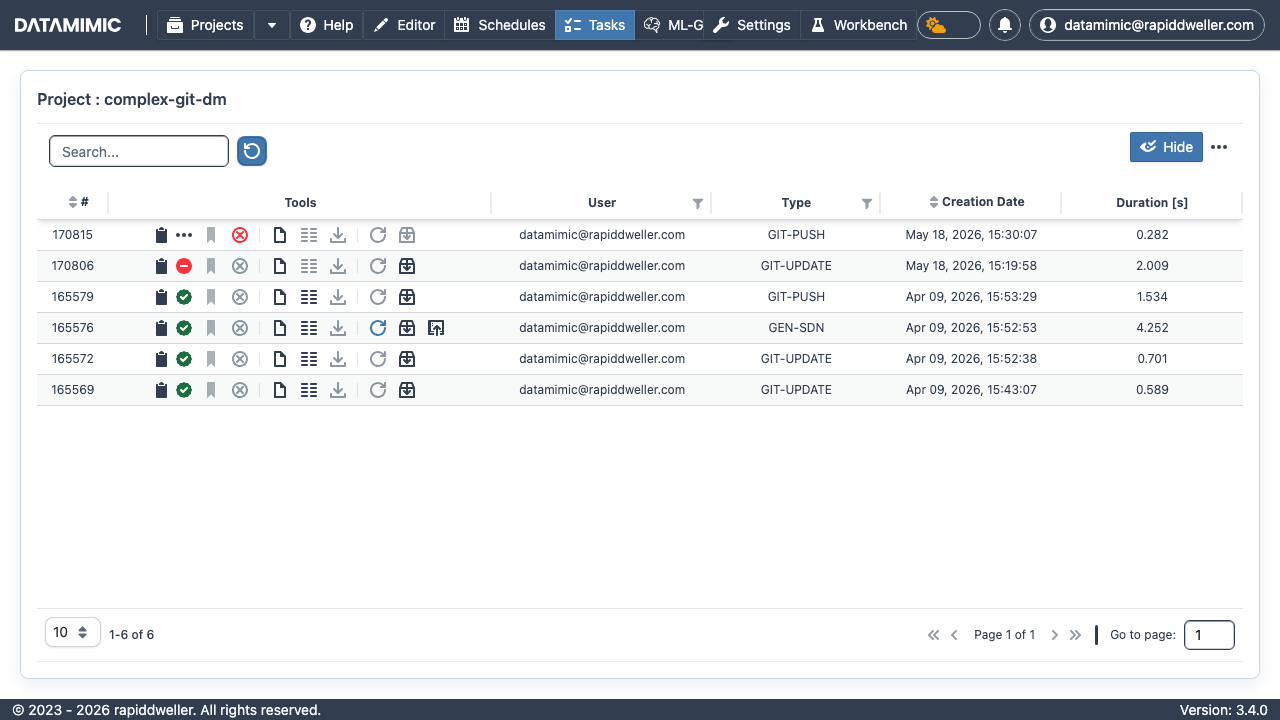
Note
The push button is only shown for generation tasks (e.g. GEN-SDN). It is hidden for tasks that are themselves Git operations (GIT-PUSH, GIT-UPDATE).
Triggering a push
- Click the
 icon on the desired task row.
 - In the dialog that appears, enter a commit message.
- Click Save Project to push.
DATAMIMIC creates a new branch in the remote repository containing the project state at the time of that task. The branch name is derived from the task ID.
Merge required
The push creates a new branch — it does not commit directly to main. You must open a merge/pull request in your Git provider to integrate the changes.
Updating the Project from the Main Branch
To overwrite the current project files with the latest version from the remote main branch, use the Update Git Project action in the Editor.
Trigger the update
In the Editor view, click the ![]() button on the right side of the top navigation bar. This button is only visible for Git-connected projects.
button on the right side of the top navigation bar. This button is only visible for Git-connected projects.
Confirm the update
A confirmation dialog is shown. Click Update Project to proceed.
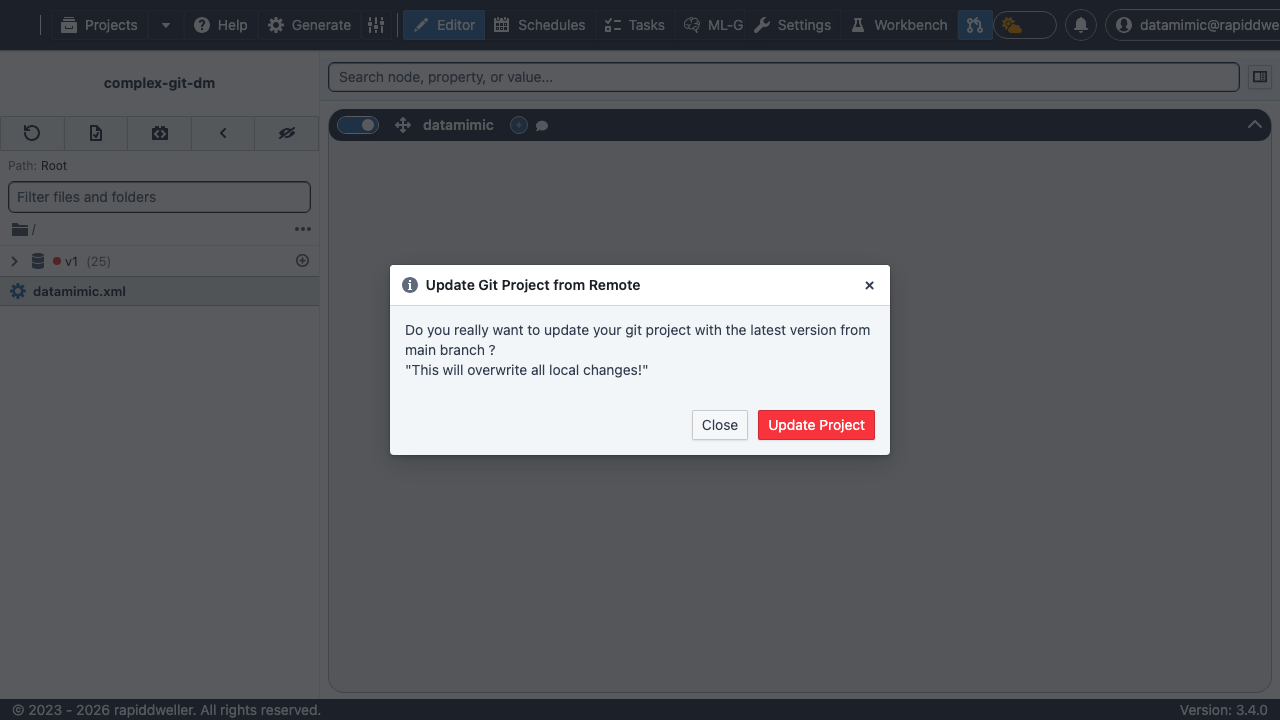
All local changes will be lost
This operation replaces all files in the project with the content from the remote main branch. Any unsaved local changes will be permanently overwritten. Make sure important work is already pushed to a branch before running this update.
Summary
| Action | Where | Result |
|---|---|---|
| Add Git Project | Project Wizard → Git Project | Clones remote repo into a new DATAMIMIC project |
| Push task state to Git | Task View → push button | Creates a new branch in the remote repo (must be merged) |
| Update from main branch | Editor → git-pull button | Overwrites local files with remote main (destructive) |